May 132012
 
Legend of Grimrock, level 12: The prison

Legend of Grimrock, level 12: The prison

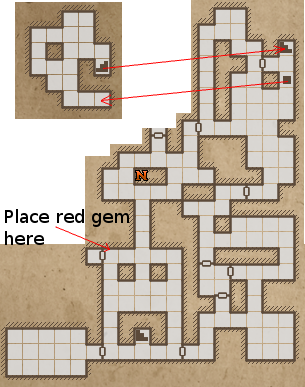
You came here from level 10, because level 11 is closed for now. Don’t worry. Level 11 is small and you will get there eventually. (All 3 last levels are small, so I’ve made the last part of this guide 3-in-1)


Another dream will appear when you unlock the door with the prison key.

Obviously, this is not Toorum, but someone else.

He tells you that the mechanism is nearby and is broken.

You need to fix it.

But first you need to fight 2 tentacle mages and explore the nearby area.

There is a place in the center of this area where 4 huge flail-wielding mechanical giants are chained and a note regarding their release will unseal the doors.

Try one.

He will charge and hit you badly when nearby.

Try to find an area where he will charge while you pump him with spells and projectiles and strafe side wise to miss his main hit.

He falls after a while giving 750 experience.

A dream will come if you sleep, telling you they drop all kinds of helpful stuff down the pits and you can get what you need there.

Pits lead to big area below in …

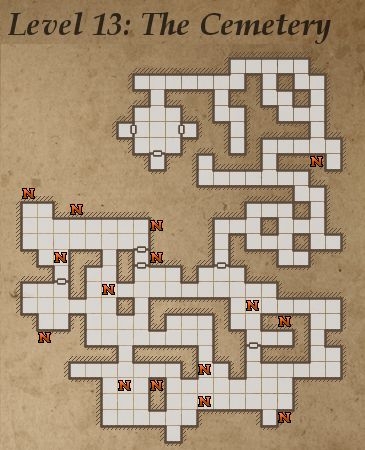
Level 13: The cemetery.

Legend of Grimrock, level 13: The cemetery.

Legend of Grimrock, level 13: The cemetery.

The area is filled with broken parts lying around and hornets and hydras stand in the way.

Cogs, gears, frames, nozzles, canisters, shafts, torches, …

All those in random order on the ground. There are 2 unique – A piece of ore in an alcove and another alcove with Infusor.

The cemetery main hall has 5 buttons, 2 of them are opening secret areas:

  • One with alchemy supplies.
  • One with food and firebombs.
  • Two of them open or close the portcullis with the portal taking you back to level 12.
  • One door north says “No entrance” is opened by the button in the NW corner.

No entrance.

The area behind the door has few spiders and crabs. Nothing hard.

One of the crabs will drop a gold key.

One chest with food and torches. (the wall beside him has a secret button opening a secret to the west corridor with th 6-th treasure – the Globe of Tetharion).

Alcove with 2 lizard steaks if you are short on food.

Supplies room has the blue healing stone and 3 golden locks (… you have only one key – again).

  1. South supplies are a full plate armor set.
  2. West supplies are torches, potions, mushroom caps and alchemy ingredients.
  3. East supplies are FireBlade and some bombs.

This concludes everything you may do in level 13. Come back here for healing or reviving only.

Revive The Undying one.

Now collect 1 piece of all gears and cogs and throw them inside the teleporter, so you don’t need to carry them with you. You will later find them on level 12 scattered around.

Kill the other 3 giants one-by-one if possible. This is most easily done by provoking in from 3 squares distance with projectile or spell. If you come very near – everyone will awaken and come bashing and trashing you.

They are hard by themselves and some more tentacle mages will come to spoil the hunt, so you can’t kite good. And this fight can prove hard, so don’t pull too much or you die. Every time you release one giant a mage(s) can come too, so be vigilant.

When done with the mobs and got near the center area where the giants were, the dream will come to tell you, you need replacement for 4 parts.

If you followed my advice – they will be lying around you – if not – drop from any pit to level 13 and collect. You need to place:

  • Piece of ore – North, round hole.
  • Steel gear – West, adjacent to another gear.
  • Blade gear – East, center of the other 4 gears.
  • Infusor – South, behind the frame in the center.

SAVE! Before inserting the last item. Remember very well where you placed all the cogs.

The voice in your dreams was quite bad cube-robot named Undying one, and you were just tricked to repair it to full might. Undying one cannot be killed by ordinary means.

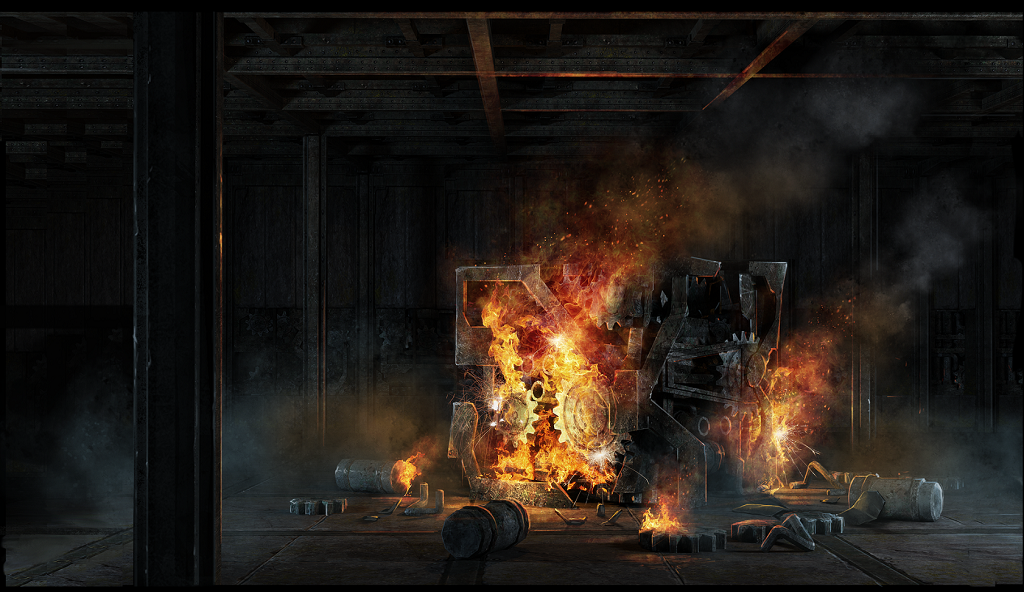
Failsafe.

A teleport will be open in the southeast corner of the map and the robot wills start summoning all kinds of monsters to battle you. Go away or you will be squashed 🙂 He is able to kill everyone by cornering the whole party and squishing you to a red pulp.

The teleporter will take you away in a room with a stair to level 11, but you will still hear the voice of the mechanical mind.

Go up to the tomb of Designers.

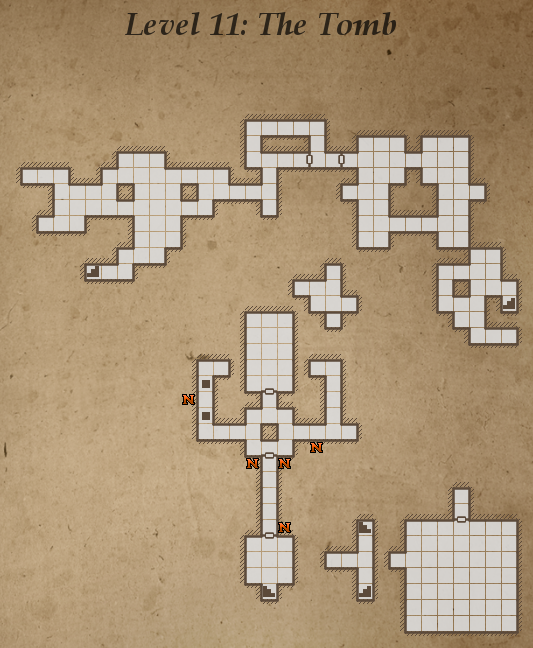
Level 11: Tomb of designers

Legend of Grimrock, level 11: The tomb

First you need to exit a poisonous corridor. 1 hidden button in the beginning and 2 hidden buttons in the end of the corridor. When you press them all, the doors will open. Hurry, so you don’t take much damage.

You will reach a fork-like area with a door in the middle needing 2 ornate keys.

  • East – 3 pressure plates with heads spewing elemental damage around them and alcove with an ornate key in the end. Use some spare junk to press the plates.

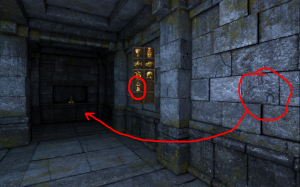
Have a look at the nearby wall for a rune-button. It opens a secret with a Goromorg Miniature (the last treasure 7/7).

  • West – Pressure plate, teleporter and 2 trap doors. Shoot a throwing knife when the teleporter is off to press the plate in the end of the corridor. This will close the first trap door. Advance over. West wall on the teleporter square has a hidden button to close the other trap door.

The area below has just one hornet for killing and you will hear the mechanical boss taunting you again. Entirely up to you if you descend or not. 175 experience is not that much.

The 2 ornate keys open a room with some fire elementals. Cool them down.

There are 2 alcoves and 4 inscriptions:

  1. Ohuj
  2. Illo
  3. Ittna
  4. Irtep

Absolutely no idea what the inscriptions mean. Probably the names of the Designers.

The alcoves have 2 scrolls claiming the designers made this whole Grimrock dungeon to hold the Undying one in and there is something that can kill him on this marble slab.

But first you need to dismantle it. When the Undying one is not whole – it can be slain.

The slab has 2 crossbow bolts 😀 How would bolts kill the Undying one!? Tingle him to death 😀 !?

If you paid attention to the 2 scrolls – One of them is speaking about shadows and it actually means complete darknes. So remove the torch from the wall, doze your own torch and/or cast Darkness. When the room is completely dark, a light will glow above the marble slab and You will receive a blaster-like weapon shooting lightnings:


Back to the Undying one.

Follow the teleporter down. Shoot the Undying one and he will be paralyzed long enough, so you remove a part of him. (You remember where you inserted them, yes?)

Every time you remove a part, he will revive and start following you again. You have 10-15 seconds, before he comes to his senses. Enough for just one removal, so you need to do this 4 times.

It takes time and precision, so be patient.

When all 4 parts are down, he is vulnerable and takes any kind of damage.

This is the final battle so hit him with anything you have.

If you get low on HP or anyone dies – use the pits to drop to level 13 and use the blue healing stone there. The undying one will not regenerate while you go heal, so you are okay.

Lightning Bombs do very good damage and the Weapon of power still hurts him quite well from distance.

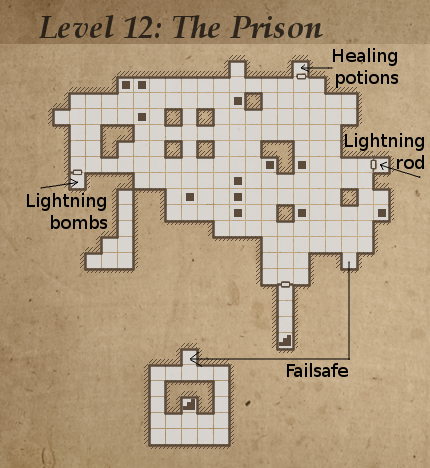
While fighting, the Undying one will squash EVERYONE and sometimes the enemies he squashes will drop any of the 3 Prison keys you need to clean sweep this level, so grab them and go away quickly to any of the three prison doors to collect some stuff:

  1. North one has few healing potions to help you. (I personally found I can’t focus on the battle while healing with potions and abandoned them).
  2. East one has lightning rod (Undying one obviously hates lightnings, because he starts shouting “STOP IT!” when you hit him.)
  3. West one has some lightning bombs. Absolutely must have, if you used yours so far.

Be sure to throw everything you have at him. He has above 2000 hit points, so it takes quite a while to take him down, but it is doable.

The end and some still-frame-kinematics with the complete devastation of the whole place:

Enjoy.

I did 😉

(Now it is time for Toorum mode ;))
 Posted by at 6:11 pm
May 122012
 
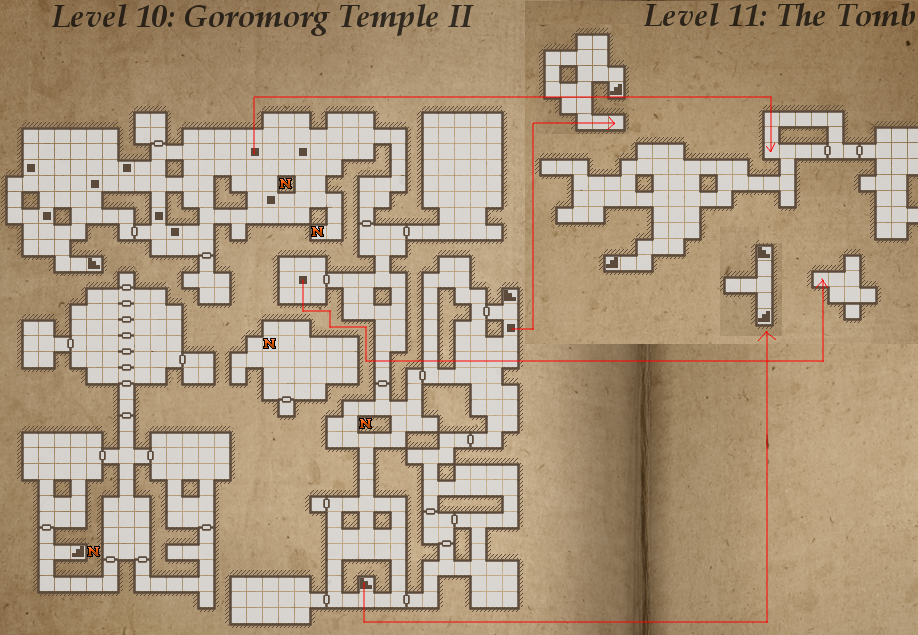
Legend of Grimrock, Map for Level 10: Goromorg Temple II

Legend of Grimrock, Map for Level 10: Goromorg Temple II

Done level 9? The puzzle turned quite hard, eh 🙂 ?

Entry and Inner Sanctum

You start level 10 in a small corridor with portcullis opened by a lever on one side and an alcove with a round key in the other.

The key is needed for the next room. The keyhole is behind one of the tapestries.

A secret room will open, there are some tar beads, one Ice lizard and 2 hornets. Nothing hard.

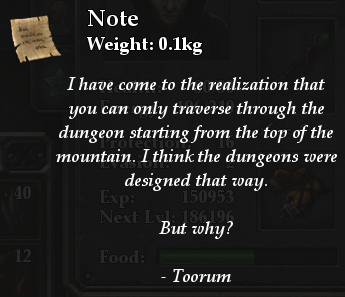
A crossroad room next. A button fires the head in the previous room and another button switches opens the portcullis with a hornet on the other side, but closes the one behind you. There is also another Toorum note about the way this dungeon works.

The south room has a pressure plate and 2 alcoves.

There is a red gemstone in one of the alcoves. If you press the plate, the portcullis from the side of the gemstone will open. If you move the gemstone to the other alcove – the other portcullis will open.

  • West portcullis is the way back to west room where you fought the lizard and hornets.
  • East portcullis lead you to another round key. Lever opening the way to the east room and a small fight with 2 hornets and a fire elemental.

In an alcove behind the 2 hornets are the Gauntlets of Valor:

Use the second round key. It will release 2 Ice lizards and a hornet. Behind the Ice lizards is a receptacle for the ray which the head shoots.

There is a way to make the head shoot through the portcullis. You need to time it precisely and you will get to the next area.

When you click the button to shoot the ray, go to the other button and click it exactly when the ray enters the crossroad. This will close the portcullis behind the ray and open the one in front of it.

Not hard – you will manage.

Inner sanctum.


Save!

After you step on the pressure plate, there will be some doors opening and walls dropping.

The Tentacle Mages are hard to beat, they have shields and do quite bad damage.

Just keep dodging the spells and hit them hard. They will fall eventually. 1000 xp per kill. Quite good for a single kill.

Inner sanctum is a crossroad hall.

  • North is a pressure plate with 2 shooting heads. (probably a secret – drop me a message if you know what they do).
  • East is a small room with 2 bolts.
  • West is a small room with a button and 2 alcoves with food and throwing axes.

Pressing the button will invite 3 more tentacle mages for killing and a teleporter in the center of the hall.

This teleporter will send you to a hub area with three doors and the exit to level 11:

Behind the tapestries is one empty alcove. If you get the red gemstone from the start area and place it in the alcove, you will open the 10-th Iron door in game and receive one very good bow:

For now – You may only go east, the west door will open much later. There are 3 loose tentacle mages and 1 hornet. Some herbs and a long sword lying on the ground.

More Hornets will come from nowhere, so arm with patience. They fall fast but their sting injects diseases.

The small room with the two hornets has an alcove with the Greaves of valor:

This completes the whole Valor armor set, but I don’t see any bonuses.

Clean the hornet area and close the doors, so they don’t bug you anymore.

There is a trap door to level 11. 4 crabs will bite you. Some frost bombs and herbs lying on the ground.

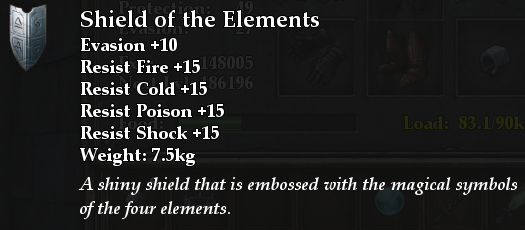
On your way back from level 11, you will find an alcove with the Shield of the elements:

Quite a good catch 😉

The area north is almost devoid of monsters. 2 alcoves with bombs and a portcullis west.

Plate helmet lying on the ground… totally clueless of what it does there.

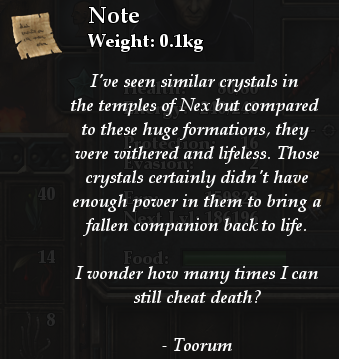
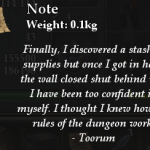
There is a hidden button opening the way to the blue crystal, another Toorum note claiming he cheated death few times and 4 fire bolts:

Now let’s proceed North. Go to the door with the colorful glass works and drop something on the pressure plate. Step aside or you will be shot by lightning.

3 doors:

  • One needs 2 Ornate keys.
  • One is named “The shrine”
  • One is named “The caverns”

The shrine

In the moment you grab the ornate key, 2 tentacle mages will come and some of the floor grids will apparently hide hydras. 5 of them.

Try to play them smart, don’t let them surround you.

Outside the shrine, where the 2 ornate keylocks are will be another hydra.

Total of 4k+ experience. Not bad.

The caverns

The caverns are a big hall with monsters.

Some bugs and four ogres. Should not pose high risk anymore. You’ve outgrown such enemies already.

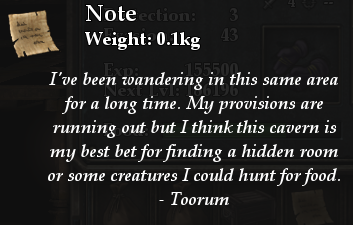
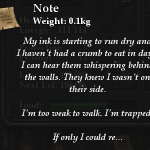
There is another Toorum note claiming that he is starving and the room nearby should have food:

Bonus: Toorum’s single player game!

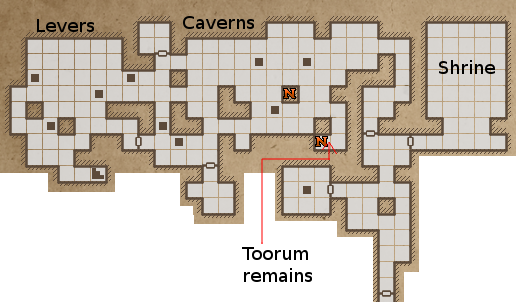
In the first part of the hall – One single column has a hidden button (west) and opens one of the most interesting secrets.
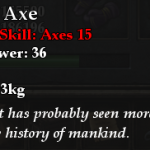
Toorum’s remains, ancient axe, hardstone bracelet, phalanx helmet, 2 weepy-goodbye Toorum notes:

Bring the remains to the blue healing crystal and click them to the crystal.

You will hear a *sigh* of relief.

Save your game.

Start a new game and choose to create characters.

In the first character creation, enter name “Toorum” and press “Enter”.

Now you can play a single player game with Toorum himself.

He is an excellent and extremely fast Ranger/Battlemage but the game is not easier 😉

Toorum, single player game in Legend of Grimrock

Toorum, single player game in Legend of Grimrock

But let’s finish this game before we jump into the fun, mkay?! 😀

There are pits to fall on level 11. The big secret hall has half-dozen slimes, some herbs, some bombs, 2 portcullis which does not seem to be open-able. Clean-sweep, collect – get back to level 10 by the stairs.

One specific pit (see the big map above) will drop you BEHIND the portcullis that does not seem to have a button or chain to open. You will need to fight 2 poison-cloud mushrooms, 3 crabs and 2 shooting mushrooms.

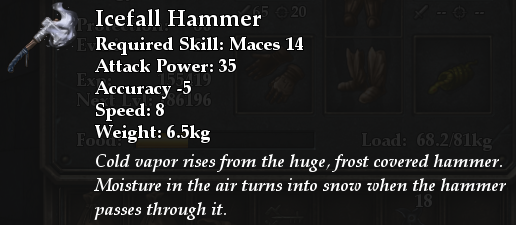
The reward is the best in-game hammer, very good weapon for hard fights, because every 5-10 hits, it freezes the enemy:

Let’s return to the Caverns above and complete them. What’s left after cleaning the main hall of ogres and stuff:

  • One room north with some Ice lizards and throwing axes.
  • One room south with some bugs and last (16-th) Toorum note:

He speaks about One wall with 5 levers, which need to be pulled (5 bits = 32 combinations). Not hard even if the columns beside the levers were not giving you the hint:

(From left-to-right): Down-Down-Up-Down-Up.


An alcove with the second ornate key will open. And 3 more tentacle mages will come to give you 1000 experience each.

As you near the Ornate key door, 3 more will come.

Ornate door opens a small room with teleporter, trap door and hidden button.

If you press the button, the teleporter vanishes and the trap door opens, leading you to level 11 secret room.

The room on level 11 has a head shooting towards the alcoves, teleporter back and a hidden button which helps you to get to the alcoves without harm by isolating the head.

The teleporter back on level 10 will lead you to a room adjacent to the hub hall where you came from. It has a marble slab with a prison key on it.

Now the fun part 😀 Level 11 is sealed, so you go to level 12 and use the prison key:

 Posted by at 10:41 am
May 102012
 

Level 9 map: Goromorg temple I for Legend of Grimrock

Level 8 was not hard at all. Even the ogres couldn’t spoil the fun.

This level begins with a sign claiming it’s a “Temple” and some fire elementals.

The long tapestries on the walls can be cut with a sword and often have something behind. In the first area after the entrance you will find hidden:

  • Button opening the “Scriptures” area.
  • Alcove with food.

Scriptures.

Fire elemental holding the Ornate key.

Alcove with a scroll about a vow from the order of fire protecting the Undying one.

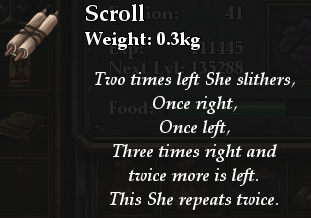
Another alcove with much more useful scroll:

Two times left she slithers...

Checkered room.

This are has 12 pressure plates and few tapestries. Behind one of the tapestries is an alcove with a scroll:

“This is the Checkered Room.
Don’t let it fool you.”

Actually both possible checkerboards which you can do in this room will open the portcullis. But only one of them is useable.

The corridors after the checkered room leads to the Armory (west) and Temple grounds.


There are two reverting squares in the corridors towards the temple. You will find them by the disappearing iron ring on the wall when you step on them. It’s almost like there is a glitch in the game and the texture fails to display but is actually well designed trick to fool you if you don’t use map often.

They rotate you 180 degrees and you get back where you came from.

To pass them – just step back and step forward again.

Armory.

The armory is guarded by a fire elemental.

There are some arrows, lightning bomb, longsword, ring mail and iron basinet.

You already have better stuff, so just collect what you can use.

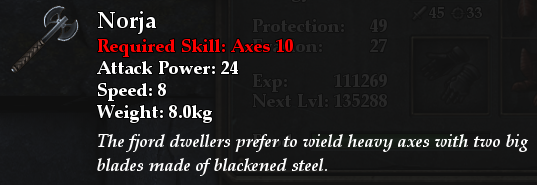
Break the crates. Behind one of them you will find a button opening a small room with a fire elemental and the Norja:

Norja in legend of Grimrock

Excellent weapon if you are focused on axes.

Temple grounds

This area starts with a warning. Cool. More fights.

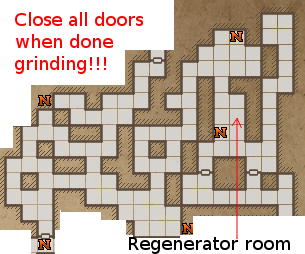
There is a generator of Ice Lizards, which will come for a fight in random number. They are not very strong but they are very sturdy, so prepare for long fights. Lizards give 675 experience and occasional Ice lizard steak (food). Ice lizard steak fills you completely, so stash them somewhere when done.

Explore the area and when you kill around 15 of them, they will drop the golden key.

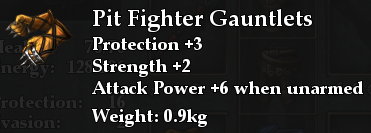
A button opens a secret room in the northwest area with pit-fighter gauntlets:

Pit Fighter Gauntlets

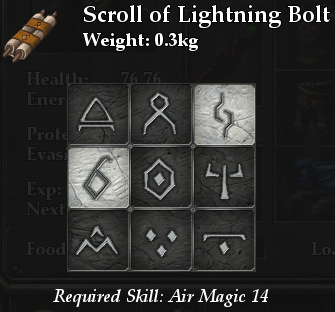
There is a lever which opens a blast door with the Lightning bolt scroll:

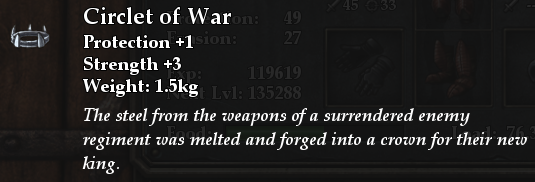
North of the regenerator, you will find a circlet of war:

Behind the regenerator room, there is area which can be closed with portcullis, so you isolate the Ice Lizards. Yo may go there to make your next stand.

Outer Sanctum.

Needs the ornate key from the Scriptures room.

As soon as you enter the room, the door will shut and 3 fire elementals will come. Try Fire shield if you have it – to minimize damage (16-th level fire spell).

[There is a button in the center area, which opens the way back out.]

The area is divided in 3 parts, each one has inscription and teleporter.


“Hands that slaughter, Eyes that deceive.”
“Three ancient beings of deep.”
“Sun of hatred.”

A scroll will emerge in the feet of the central statue after you unsuccessfully enter any 3 of the portals. It says:

“III – II – I – III”

Now let’s get back to the inscriptions:

  1. Sun of Hatred (One sun).
  2. Hands that slaughter, Eyes that deceive. (Two hands)
  3. Three ancient beings of deep. (Three beings).

This means, the order is: West-North-South-West.

This leads you to the next area, with some trap doors, shooting heads and teleporter back.

Drop something on the floor, so the plate remains pressed.

Don’t go towards the heads – poison cloud.

Drop something behind the portcullis, so the pressure plate opens it.

On both sides of the trap door will be levers – pressing both opens small room with alcove containing another Ornate key.

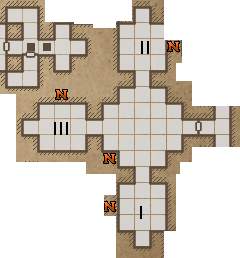
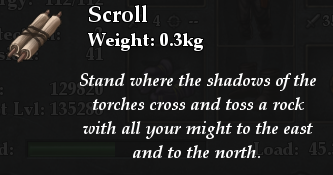
The trap door leads to a room on level 10 with 3 empty torch stands, teleporter back and small secret room. You need 3 torches and 2 rocks to open it:

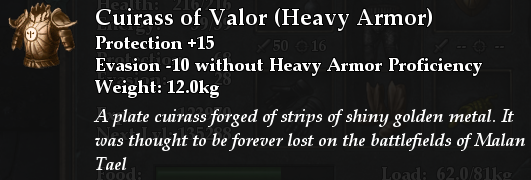
Cast darkness just to be sure (I marked the torches’ “cross” with N on the main map). (According to Chris – you may also use Throwing stars instead of rocks and it also works.) The reward is the “Cuirass of Valor“:

Pillared hallway.

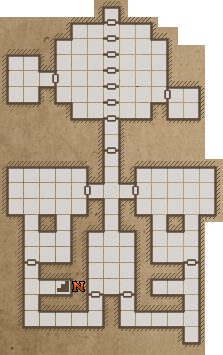
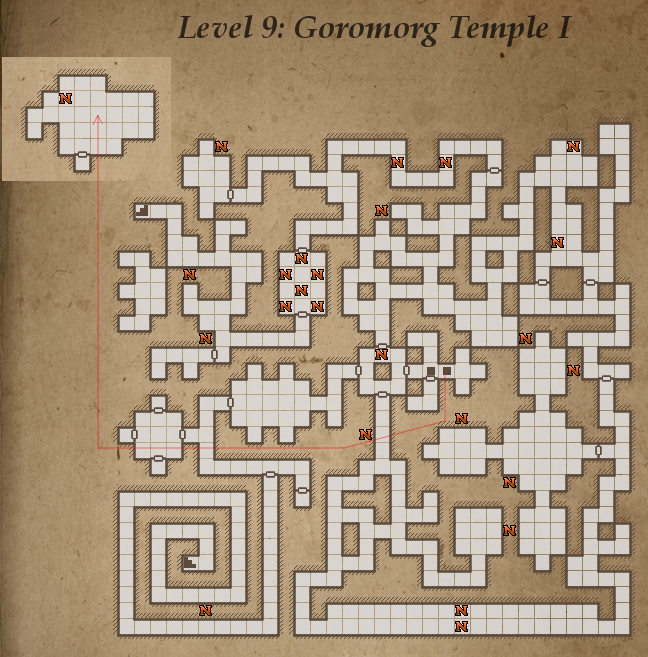
There are invisible teleporters, take you back from where you started and the hallway looks endless. See the map. This is where the clue “Two times left she slithers …” comes into account.
I’ve drawn a map for you, if you can’t figure it out yet:

Pillared Hallway

If you don’t do it right – you get back to where you start.

A fire elemental will come to greet you for your success reaching next area.

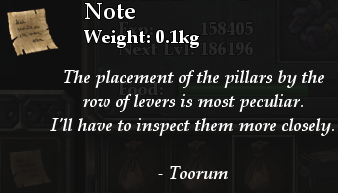
There are some corridors. In one of them you will find another Toorum note pressed by a rock:

One room has 2 hornets and some tapestries for slashing. Behind one of the tapestries is the Lurker hood. The hornets can disease you, so be vigilant.

Corridors end with a blast door opened by a hidden button (west wall, 2 squares before door).

In an alcove, you will find another free level-up:

Taking the book opens the four side walls, so you need to take it (who wouldn’t?). This allows you to get faster to past areas and opens another way west.

The way west is the blue stone and one…

Extremely nasty cryptic puzzle 🙁

There are 4 inscriptions and 4 alcoves. The inscriptions say:

  • “Tear of the Land”
  • “Game’s bane with head of steel”
  • “Unraveller of Mysteries”
  • “Severed Dread”

You need to place items in the alcoves, according to the short puzzle inscription. If you manage to guess the item, the alcove says :Click:

It took me some head scratching. I was a step away to run to the forums screaming and cursing. The easiest 2 to guess are…

  • “Tear of the Land” – is ordinary rock. There is one on this level, pressing another Toorum note (look above). Not hard to guess – but it was still a fluke.
  • “Severed Dread” – is a skull. The verb “severed” is used for body parts. (Still quite hard if English is not your native language and there are no other hints.) Let’s hope you have a minotaur Head Hunter with you and you collect skulls. Otherwise, the best place to look is in the end of level 7 in an alcove, just before the main exit to level 8.

Now the two others, much harder:

  • “Game’s bane with head of steel” – An arrow ;( … I actually tried all helmets and got 2 levels above to collect few more from places I’ve stashed useless junk. Then I’ve tried watching the GAME opening video and staring at the GAME’s logo to spot SOMETHING that is the BANE of the GAME and has steel HEAD… Then I remembered, that GAME also translates as something TO HUNT, such as deers, boars and so … and they are hunted with arrows. (Bolts will also “click” if you don’t have arrows).
  • “Unraveller of Mysteries” – turned out to be a key. But I also tried the compas, most of the Toorum scrolls and some things that were not logical at all. Then I’ve surrendered and read the game forum. Obviously the two loose keys were here on purpose. There were no any more doors to open on this level and … CLICK! Both gold or ornate key will fit.

After the door opens – you may collect all your stuff back. No need to abandon good arrow or +3 Minotaur Head hunter attack from a skull.

After the exit is an alcove with scroll praising your awe … you don’t say.

There are few more easier areas left.

The treasury.

3 gold key doors and only one gold key again.

  • North room has second Flarefeather hat and second Serpent bracer. You already have such items if you followed this guide.
  • West room has plate greaves and 2 frost bombs. IMHO – totally useless.
  • South room has ANOTHER book of Infinite wisdom.

Puzzle room

“Made from the dead
Guillotined Man
does not need me.”

The answer is Bone amulet. There are 2 in the upper levels, so go collect if you dropped them. (First bone amulet is on level 2 – room “Enter thy grave”. Don’t remember where I’ve found the second.)

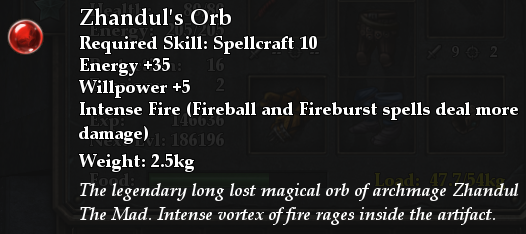
The reward is Zhandul’s orb. Quite good for mages:

Zhandul's orb

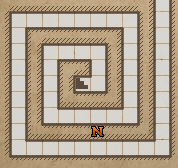
Next area is opened by ornate key you took from one of the puzzles. (You don’t abandon it in the alcove in the previous puzzle – yes?) The area is a spiral going clockwise:

One long corridor south, then long corridor west. In the middle of the second corridor is a button. It opens the door back to the start. There are 2 ogres in those corridors. And when you get attacked a wall will barrage your way back. So, in case you need to return to the blue healing stone for revive – be sure to find the hidden button.

In the end of the spiral is the way to level 10. Good job. Time for Goromorg temple II.

 Posted by at 12:43 am