Launch GIMP. If you don’t have it – download it from their site. It is free and multiplatform (works like a charm in both Windows and Linux environment).
Step 1. Decide what size your GIF animation will be. Then go to “File -> New” and enter your desired size as Width and Height.
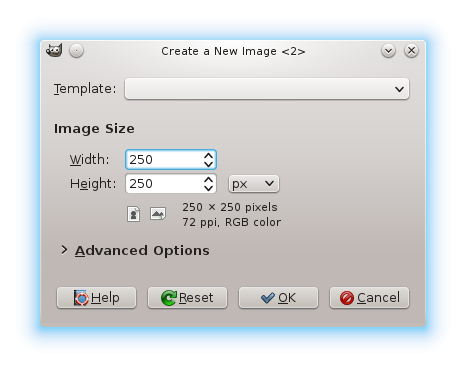
Choose GIF size.
Step 2. Decide how many frames should your GIF animation be, then go to Layers window and duplicate the “Background” layer as many times as the frame count you choose.

Duplicate background Layer.
Step 3. Hide the ones, that are not currently needed by clicking on the “eye icon” beside the layer, choose the one on the bottom and name it “Frame 1” (Click on the layer and press “F2” to change name)
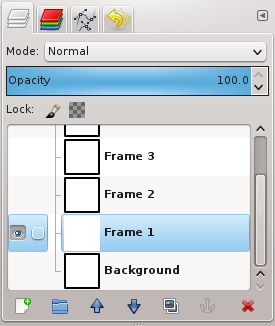
Select frame, disable the visibility of the others.
Step 4. Draw your frame or paste the prepared picture on the white space and then merge it on the layer. Repeat for all frames.
Step 5. Go to “Filters -> Animation -> Playback” and have a look at what you’ve done so far as a sequence. Edit or fix frames if you don’t like the smoothness. Tweak until satisfied.
Step 6. Add the delay of each frame in milliseconds by editing frame name, like in step 3. 1000 milliseconds equals 1 second. Use Playback again as in the previous step, until the timing suits you.
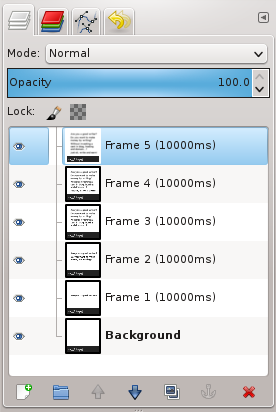
Add desirable timing for each frame.
Step 7. Use “File -> Export” choose file name and use “.gif” as extension. Choose file type from the drop-down menu below to “GIF” as well. Be sure to check the checkbox for “Animation” and “Loop indefinitely” if you want it to cycle indefinitely.
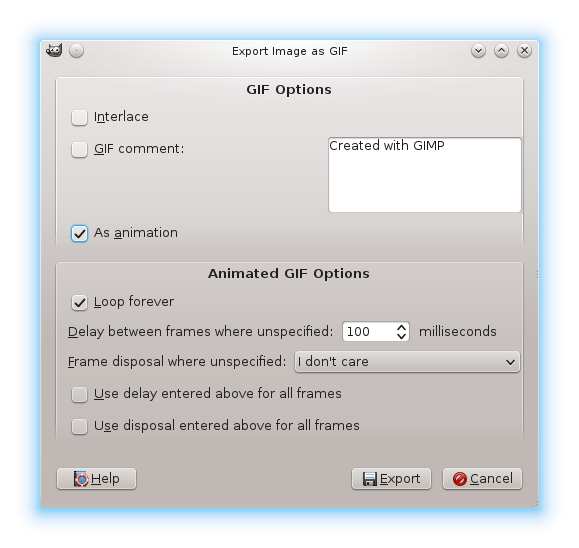
Check those 2 checkboxes.
Step 8. You are quite done. Open your newly created file with any browser capable of showing GIF animations.

Completed GIF animation.