 This is another free RPG I want to point out. It’s free to play, the company gets their profit by selling you some premium items, but can be completed without them. Some of the premium items, you will find ingame. There are two specific items, that need to be bought. They are passes to bonus maps that give you large leverage in game.
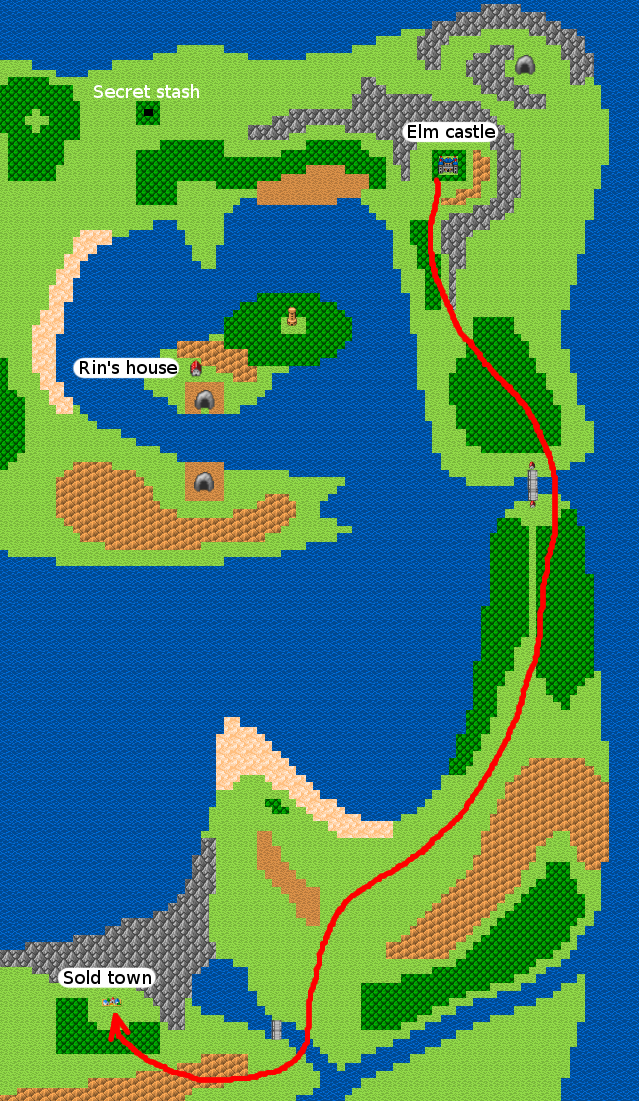
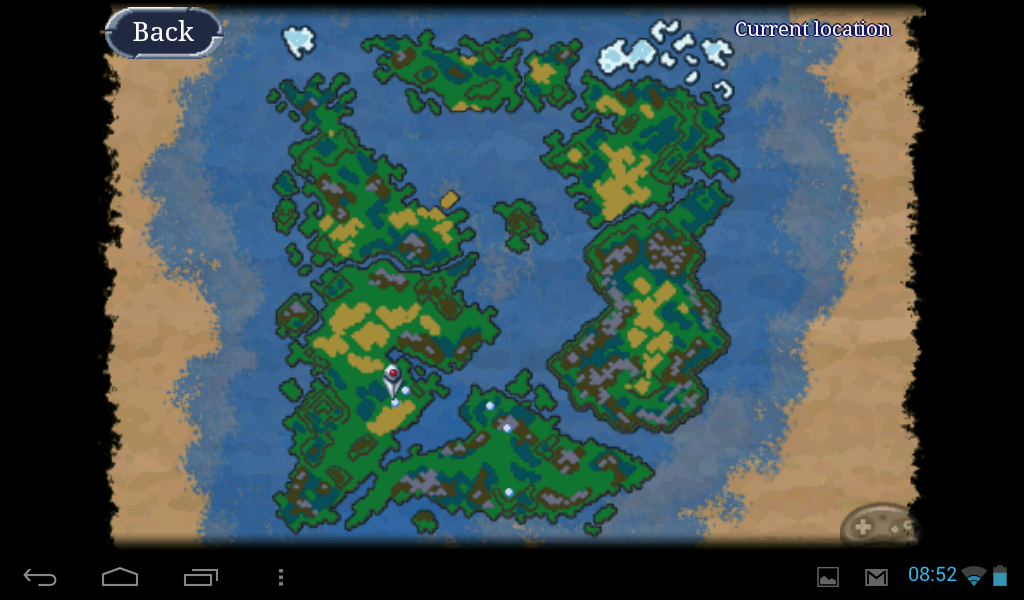
There are really just 2 hard quests in the whole game. Finding Yuuizo and finding the other half of the spirit soulstone buried in Cureo. I have explained them here. So, let’s start.
What you get from the intro:
- You can play and finish the game without premium items.
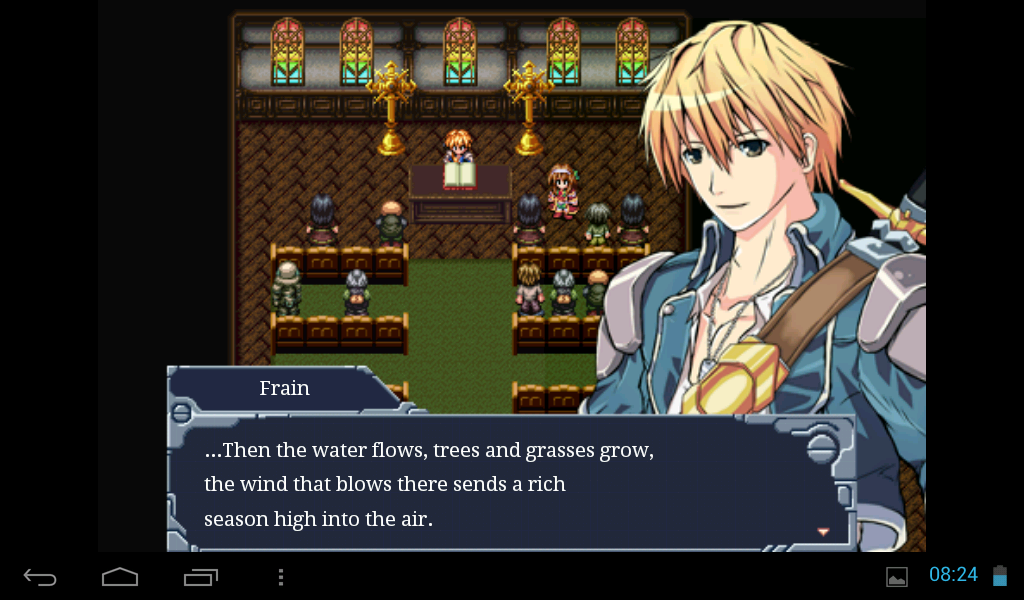
- You start in a lab with scientist and a girl you promise to return to.
- Your name is Frain.
- Your mission is to save humanity from the scientist’s mistake.
- You get teleported to another world in the village of Col.
- Your first quest is to reach castle.
Have a good talk to everyone in the village. Not much to learn.
- Dandong is north, but beware the Panchos.
- The priest will tell you about the gods that created the world and life itself.
Loot all buildings. Nobody will object. Apparently, in this game – stealing is not a sin 🙂
2 hidden object (herbs) are scattered in pots and barrels. If you get nearby, there is an exclamation mark hinting you to click.
Inside the Inn is a drawer with a hidden object (a tale). Resting in Inn costs 10 gold per night. Every Inn will have this price, so money are not an issue.
Inside one of the homes you will find an adventurer’s diary pointing eerie cave and a secret. Some stuff in nearby chest and drawer.
 Leaving Col

As soon as you leave town, some Panchos will surround you and young lady named Aulin will come to help you and gift you your first weapon.
Battle is not hard. Then you decide to part ways and she could meet you again later.
Grind a bit.
You can raise your level easily to 5+ for 10 minutes. It will pay later. Just have a look around and do battles. If injured below 200 hitpoints, go back to Col to rest for 10 gold.
Dandong.
There at last you will see a shop to buy and sell items.
A woman will explain what is where in town. The bad part is – nothing is open yet 🙂
As with all new places – loot everything and speak with everyone.
- Blacksmith. – Nothing to loot and nothing to buy but one of the smiths will gift you your first upgrade tome.
- Weapon shop. – A soldier will remind you need to equip items, not just carry them.
- There is also a herb/tool shop and few resident houses. Some of them have libraries for reading and people tell you there is a shortage of food. Seems not only your world has problems.
- Tome of manufacturing and a scripture are hidden NE of the inn in a barrel and small deadend street.
Castle Dandong.
The guard will just let you in, so go ahead and speak with everyone and loot everything.
You will learn that all world rulers are cousins of the Dandong ruling family. There is guarded guest room which you can’t enter yet, but most of the castle is open.
Area 1F is quite boring. Even the library is empty. Area B1F (basement) is accessible through the east stairs. There are 3 chests there with tome of steel spear, Juice of Demazi and 1000 gold so be sure to descend there!!!
 Throne room.

You will make smalltalk with someone who looks more like a steward instead of a king. Politics and diplomacy here are not the same as you know them. In the middle of your meeting a soldier will interrupt telling you giants ransacked the vilage of Col. The steward will order your arrest believing you arranged this attack and the guards will chase you out. For some reason, the next thing you will see is – yourself in the forest. 2 thabitors (robots) will surround and chase you out. You run and search for the gate back, understanding you have been abandoned in the world.
It seems you faint and Bell, a local girl brings you in the inn of the seemingly intact village of Col. Then she runs for the bishop and another part of the story will be revealed.
Aulin comes to see Bell and another long talk goes on. With some fun parts. Then you all sleep and start a new day with quest to return to castle.
All menus are open now so if you raised some levels – go explore your stats and inventory 🙂
Aulin and Bell will show you a bot captured from the last attack and explain that near Dandong is a dungeon with big Golem machine that came alive when the bots attacked. You promise to have a look when there is chance. Actually it is closed for now but this is where you can buy premium items, which help game developers to release this game as free-to-play. Up to you if you will.
Back to Dandong.
Visit all shops that refused to serve you last time.
Blacksmith will explain how he works and give you three weapon tomes. They all need drops from the monsters in the wilderness, so don’t bother for now.
Armory will have a 1500 gold worth of useful items, so I hope you listened my advice to rob the castle basement. Bell uses cross instead of shield and Aulin prefers to defend herself with earrings 🙂
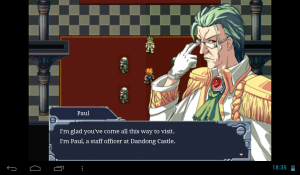
Go to castle. The guard will be scared of (princess?!) Aulin and let you in to see Paul. Speak with him again. In short, he sends you to nearby city of Lecom to help protect the other piece of soulstone ore that your invading world probably wants.
After this you will have access to upper castle floor where library is. Go read and loot.
Paul tells you about the guards in castle entrance who give quests, so from now on – check the guard station in each castle.
 “First errand”
Your first side quest is to get to the east cave and help with punitive expedition. It is called “First errand” and is quite simple – kill 5 panchos and return to the guard in the cave’s entrance. Don’t forget to collect all sparkle stones while inside. They can be harvested multiple times. There is also a chest 🙂
The quest gives 200 gold. Not bad at all for just five kills. Then the guard will give you a piece of wood. Choose to support Bell and take the Machina Board tutorial 😉 this is important. Your skill tree is there and you can fine tune it by raising levels and adding soulpebbles to them. I’ve not tried to play the game without the machina.
If you listened to my advice and trained to levels 5-6 – Go deeper right inside the cave and you will find a chest with your first soulpebble of fire in a chest. Some lizards may try to kill you, so use Bell’s healing spell.
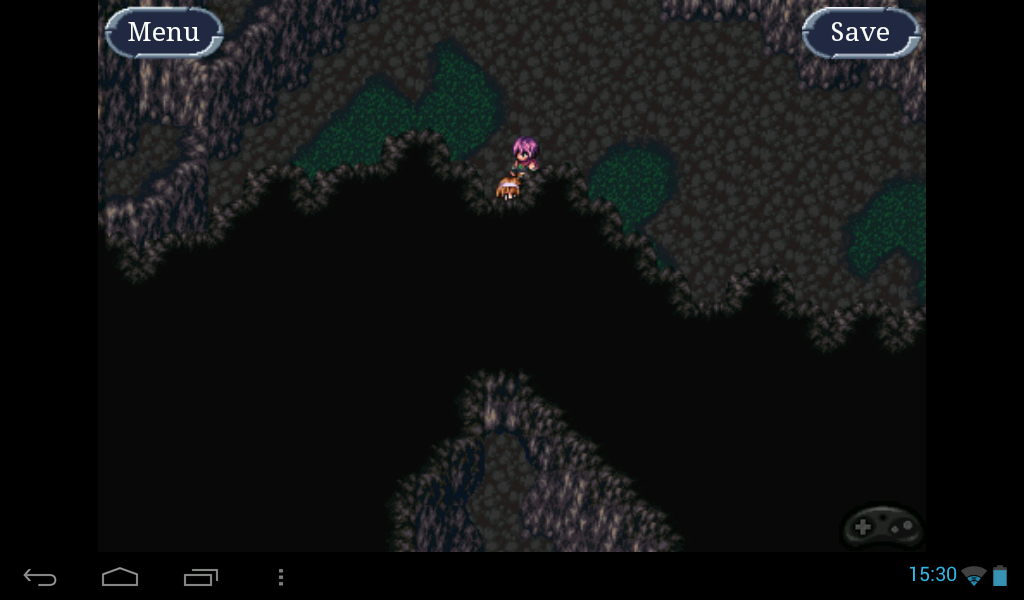
Push the pressure plate in the eastern part of the cave and start getting back. 5 walls will be demolished and have chests and sparkle stones for harvesting, The most important one is in the west part of the cave, almost invisible (see picture). There in a chest stays soulpebble of light. This kind of pebbles are very good to empower Bell healing powers.
Return to castle Dandong to get the 200 gold reward and take the other quests. All except one can be done in the same cave into the east, so return and make some more kills. You can easily train your party to levels 10-11. One of the quests will simply give you clothes without much explanation. Gather at least 3 clothes by confirming the quest. You will need them exchanged in Lecom later in game.
Only the bot kills must be done outside. They are not near the castle vicinity, so you will need to postpone this quest for later. Go east from castle. There is a small forest square enter …
Dandong road, forest of Framp.
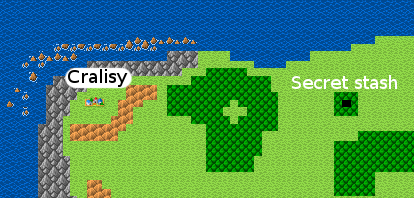
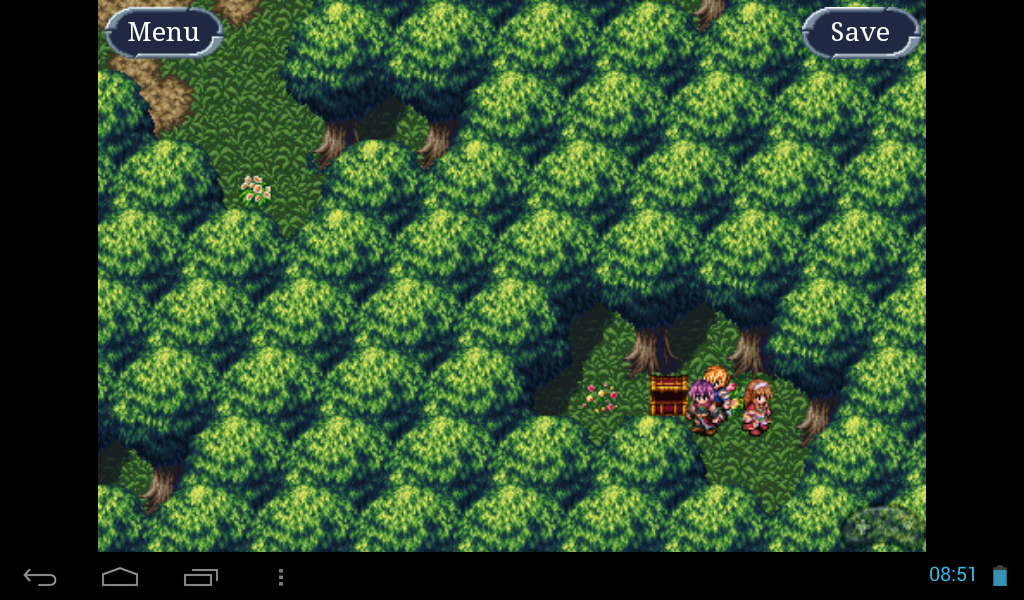 Be sure to collect the soulpebble of earth from the hidden chest in the SE corner of the map. (see picture) Harvest all resources.
You will probably do fine with the 2 new monsters on this map, but be aware of the Liquid’s special attack. It can do 80+ damage on level 12 chars.
In the NW corner, there is a soldier telling you about the road being blocked. You need to fix it to continue to Lecom. Paul will refuse to send more troops and will tell you to go speak with his lab rats who make new weapon 🙂
Flash light.
Obviously, they build a bomb and they need ‘niter’ to ignite it. The substance is abundant in the east cave, so if you left some quests there, go get them and head back to the mine. Each time you reenter, you can harvest another batch from the sparkle stones.
If you have not already – go to the east part of the map and press the floor plate so you unlock all mine secrets. The niter ore is in the middle area of the mine, just north from the small piece of niter (green shine). Collect and go back to castle.
Sometimes when you sleep in Inns, there will be cutscenes with your party which will help you know them better. Bell is scared of thunders while Aulin loves them. Bell will explain how she was abandoned in the storm from her parents in the midst of the great hunger years ago and that’s why she hates them. Then you both beat Aulin with pillows 🙂
Anyway. Return the niter ore to Dandong’s lab and you get detonating powder and 500 skill points. The lab rat will almost try to seduce you 🙂 . Quest complete. Go back to the forest to clear the rubbish on the road to Lecom.
Once you break the rubbish with loud bang, you will get 1000 skill points and will be allowed to go north by the sea, but you will actually end up in the next part of the Forest of Framp. Harvest and get the soulpebble and root of Azi from the chests.
Proceed further north. Another map with two chests. Soulpebble, and tome of chainmail. Gather and keep north.
Lecom road, forest of Framp.
Some chests with soulpebble,
You can complete 5 thabit kills on this map. They are mechanical bugs, not as big as the other bots sent by your homeworld. And not too deadly. Dandong is a bit far to report and claim the reward though. When done, exit this map from north exit.
 Lecom.
Castle is directly north from the forest’s exit. It is already under attack. You get new mission in the moment you enter the outer castle wall.
As a survivor.
Liberate the city and visit the shops. You will need about 11k gold to buy best arms and armor for level 13-15 party, so IF hope you listened to this tutorial so far and did all quests and tasks to gather at least 8k.
Innkeeper will give you soup (cure you of all illness). Just don’t forget to rob his basement.
Proceed north. Be aware that Thabitors do a lot more damage and have mass skills too, so don’t take them lightly. Hit them with all that you have.
Most of the houses are with humans only, so just check them for stuff.
Church has a library and a secret room that must not catch fire 🙂 . A chest beside the church has another soulpebble.
Proceed north, the king is under attack. You need to save him because he has some lumbar pain and can’t hold a sword 🙂
 Replican.

Forget Auto fight, hit him with the strongest skills you have. He is particularly weak to one of Frain’s water attacks if you managed to get him to Mercenary level 5. He has 5000 hitpoints of life. If you manage to do that much without losing a char in the battle – you will be okay. His attacks are strong, so beware and heal with Bell if you get below 50%. Especially with Aulin.
Does 399 damage on single attack and 30-150 on mass attack.
1200 experience and skill points, 500 gold for killing him.
The king will give you their soulstone for safekeeping without much hesitation, a world map (finally) and Bell will cure his lumbar pain. Everyone is happy 🙂 . Speak to him again and he will give you a pudding quest from castle Dandong’s inn. Take it.
Now get some look around the castle. Speak with everyone and peek in all possible holes.
- 4 chests in map 2f. Gold, perfume, herb and ingredient. Directly east from king’s throne room.
- Map B3f has some chests, barrels and crates. Transfer pass “S01”, mazie, tale, and fire soulpebble.
- A soldier in the armory (castle, 2f) wants you to deliver a duel challenge letter to a woman named Jillje. Take it. The girls will bitchslap you for not doing it willingly 🙂 Jillje is actually looking like a soldier next to the king (with red uniform) and it is VERY easy to miss her.
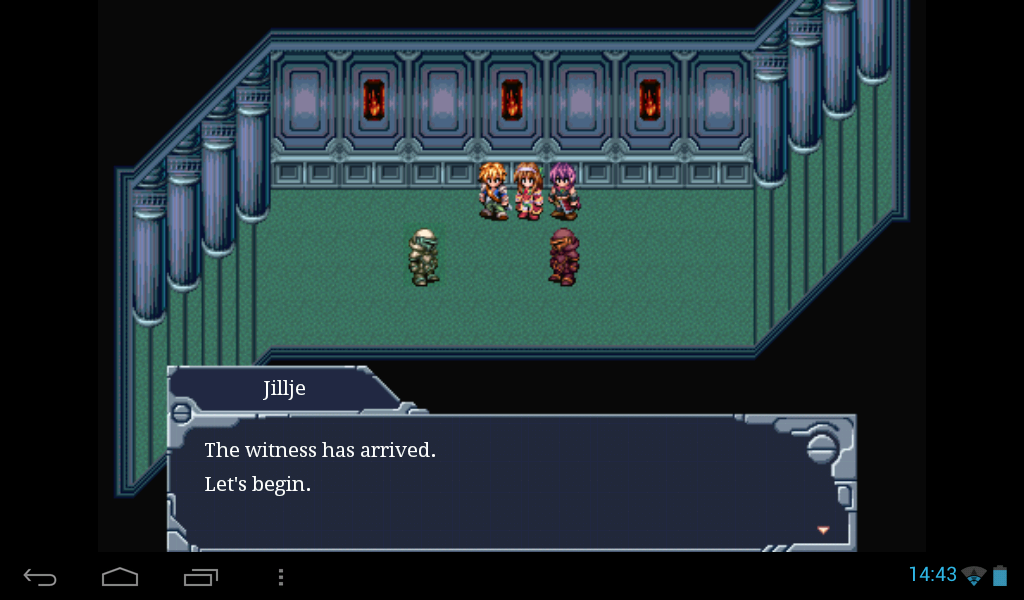 Go to the cellar room and witness the duel. It is the 15-th time she accepts dual and always single-hits him. The girls decide they want this story to the end and you need to help 🙂 so go to Jillje again and ask her. She will explain everything and … you will have to decide for her 🙂 Let her lose the fight so her man has some dignity left. Regardless what your choice is – 1500 SP and a tome of justice.
- Confirm all quests from guard station dispatcher. One of them can be done if you took the cloth from Dandong 3 times as I explained earlier and you get smooth cloth as reward for every three pieces you exchange. Two of the quests are doable in Forest of Framp If you decide to return on foot there.
- Outside the castle wall you will meet Fraiya from your world. Girls will get jealous 🙂 Choose Not to go back with her. She will let you and then speak to herself with ebil demonic voice 🙂 expect your final meeting with her to be quite violent.
Return to Dandong.
Get the forest road again. You can skip it by clicking Dandong on the world map, but you have 2 guard station quests doable there and it’s always good to gather some more stuff from the forest.
Get [Pudding sub quest] from the king of Lecom. The innkeeper wants you to gather bird eggs from the town of Keyan. It’s north from Lecom, so you will get there later in game. Skip it for now. Go see the king and turn in the last guard station quest for 500 gold and skill points. Don’t forget to get some white cloth from there too. Lecom’s guard will exchange them for finer silk cloth at rate 1:3.
And don’t forget – Gather the new quests, you need to speak to some of the citizens for this:
[Chiki on trouble]. Seems Chiki lost 10 gold coins and you need to find them or gift them 🙂 Chiki is near the church. The gold is near the tool shop, sitting beside the barrels. 300 skill points for retrieving them.
[Yuiizo, the musician]. Listen to the story of the guy near the tool shop (just a bit south from the three children playing). This is a multipart quest, so fo now you just listen to the guy’s story. He points out Yuizo headed to Lecom.
[Glenn’s first love]. Bishop Glenn loves Feane. Go to the tool shop and secretly ask her how she feels about it. She feels him like a grandpa giving her tons of candies 🙂 but regardless, he still wants you to deliver his proposal to her. She wants him to live 120 years and you need to choose what rose she is to give to him, pink or yellow. Yellow rose means a lot to bishop Glenn and also means friendship. Pink rose means gratitude. 500 skill points for completion, regardless of your choice, but yellow rose also gives him absolution from Bell.
[Solve the mystery at the Ruin of mystery]. A prodigy girl at the library room in the lab above the castle gives you a bun-shaped treasure detector. She wants you to go explore the ruins north of Dandong.
Go inside the ruin. At first, noone will attack you. If you have already been there, you will see some of the doors open now. if not – have a good look around. There are some inactive teleports and two machines who sell game currency and premium items. The game is free but the authors have to eat something too 🙂 There are two loose chests to loot. One of them holds an excellent ring for magic users,
Go northeast through the corridors until you find the stone slab that will activate your bun-shaped detector. You can’t miss it. It glows and as soon as you get near, mr. Treasureboy speaks. It is half a letter written as if someone knew of your arrival. A voice tells you for the first gate being opened and above the stone slab a door with portal opens. Get the herb from the NE chest first and proceed through the portal. If you looted king of Lecom’s secret room (see above) you will have the passkey S01 to open this portal. Mysterious ruin S1 is the next map of the ruin. You can be attacked here, it’s not a peaceful map as the first one. There is another portal behind a small chasm, but you can’t pass yet. A gate that claims it’s being opened and another stone slab. The slab says the person was living 700 years later than Frain and was named John Doe 🙂 then second door now really opens. Chests with some Mazie, virtue pill, and the Cloak of late night, in the secret corridor just before the third gate. Find the third tablet. It says there were people stranded here, who can’t recover the portals back and the locals were too aggressive. You decide to find what their fate was and if possible – repair the portals. Third gate opens. The last part of this area has a chest with Azi root and a portal that wants pass S02. You will need to come back later when you find it. For now proceed with the main quest line…
As a saviour.
Speak with Paul. He will refuse the stone and you will decide to take the faith of the world in your own hands. North from Lecom is Haldea, Your next target.
- Go through Lecom again to turn guard station quests.
- The blacksmith will give you a gift of 3 tomes 🙂
- [2-nd part of the quest for Yuiizo’s] whereabouts can be told by a man in the market square between weapon and tool shop. He points to Keyan.
Go around the vicinty of Lecom and make the other kills neded for guard station quests. There are 2 mines in the nearby forest to the west and southwest where you can harvest silver ingot, raw steel, raw silk and rotten seed. See the map.
Only one guard station quest can’t be completed yet, so when done – proceed northwest to the city of trade.
Keyan.
Gather all barrels and chests.
- Tome in SE corner.
- Tomes of ripple and flame manufacturing and a bundle of herbs in west mansion.
- Tomes of Airs, Jane, Niagara and Kilauea in mr. Bally’s house.
- Tomes of quake and sonic manufacturing in east mansion. And a soulpebble in the chest on the second floor.
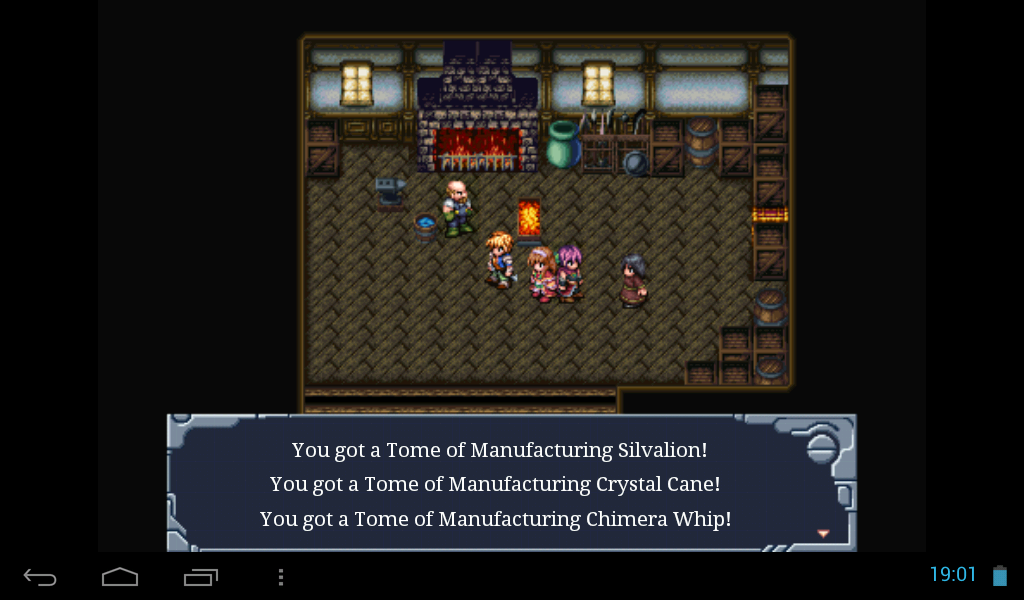
- Tome of platemail in a chest in the blacksmithy. Silvalion, crystal cane and chimera whip are also obtained by speaking to the smith.
- Tome of hand woven cape in a barrel near the northwest private house.
- Silver cane and halberd tomes and some herbs are found in the other small houses.
- There are also 2 strange books found in the houses regarding men and women.
Be sure to visit the church square to the north.
There is a chest behind the church with soulpebble of light.
Speak with everyone.
- There are some better things in the armory worth about 3000 gold. Go buy them.
- Be sure to visit the tool shop. They will give you the [eggs for the king’s pudding]. They also sell one excellent ring with +1000 life points. Be sure to buy one for everyone in your party.
- A woman in the center of the town will tell you about Yuuizo owing her 20000 gold and points to Haltea castle.
[Crisis of a fragmented nation.] You need to decide who will be the next headman of the town. Maurice or Robin. You need to listen to both brother’s opinions first. They are in the big manors in east and west end of the town. Aulin tells you to start with the east mansion first.
|
|
Return to Dandong.
- Take the eggs to the inn and get the pudding from them.
- Representative Robin is in Dandong. Find Robin, he is one of the castle dormitories (room with many beds) on the upper floor. He is power greedy and badmouths his brother Maurice. Not really a kind person but wants to make an independent kingdom of Keyan. A bit militaristic too.
Head back to Keyan and don’t forget to get the pudding to Lecom’s king on your way there. 6000 gold, 2000 SP and a soulpebble of water upon completion.
Maurice (“Right side up”) His servant tells you Maurice is in Lecom, so you are to go back there. Maurice himself is on top of the castle watching th horizon 🙂 He has a baby-step plan to build the economy and is more moderate than his brother. Does not badmouth and respect them for what they are, but seems he is a bit of a communist.
Blank drawing board. Whatever you think of the 2 brothers, Bally will listen to Bell and ask a third party she proposes.
Speak with the priest in the church, the two brothers will conveniently return to Keyan while you speak to him and request his presence in the town square. New quest “Shining love” is issued.
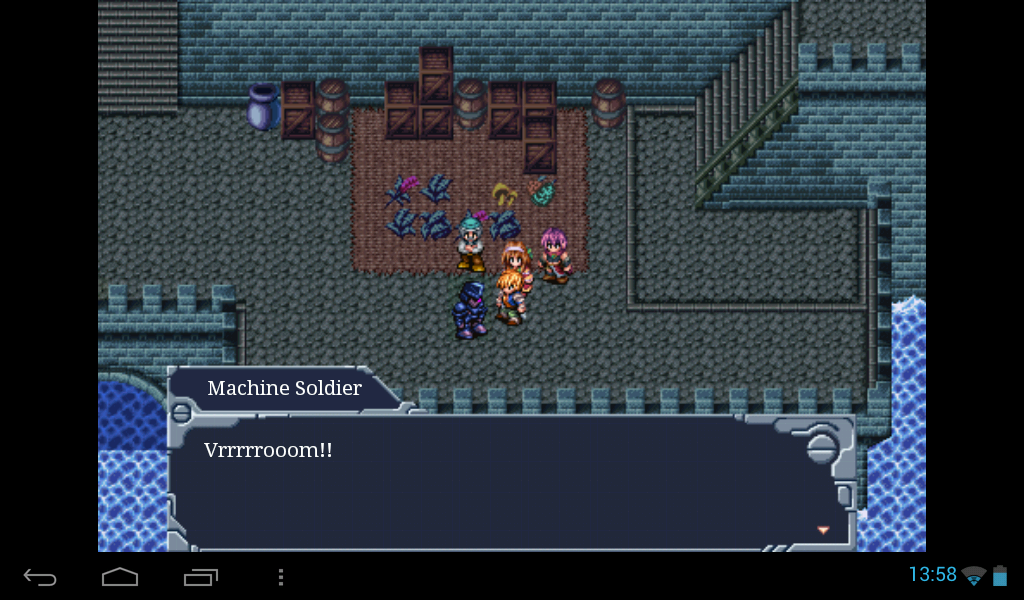
Go to the town and see the cutscene. They seem to have a bit of a quarrel and then two machine soldiers come to attack the town. It quickly becomes clear who is the best head man. 5000 gold, soulpebble of wind and 5000 skill points.
 Let’s explore a bit before going north to the next town. There is a small oasis east of Keyan with 2 shining sources of cocaito coccoons and tree arms. Mark it for later, when you need those resources. There is a small island cave to the west, which can’t be accessed for now.
Go north.
The area north of Keyan has thabits and thabitors. They hit harder and have mass damage skills, but you can complete the Lecom’s guard station request (5 kills), so take your time. Tome of galactic cane, 1000 gold and SP is the reward.
Check the island area with 2 bridges northwest of Keyan. There is a hidden cave in the second island with resources inside, that you can gather Smooth cloth, hard scale and holy drop.
Keep north, the area after the ridge, before the next town has two good monsters tor training your chars. You can make it to level 20 without much strain. Stake and Landhoe. Stakes cast Dorea, so be careful. Keep north.
Haltea castle.
Small cutscene and you can proceed. Have a look at the east wall, a chest with tome of Darby king stays on its base.
As with all new places, speak with everyone and poke your finger everywhere.
Town part.
- Armory has few kinds of shields with elemental protection. Quite costy though – 9000 each.
- The church’s nun tells you about weapon’s shop “uncle” stories and how he drinks when telling them.
- Wing of spirit, Tomes of Terano, Satanium, feather cape and robe of golden thread are hidden in the east private houses.
- Silver ingot, tomes of Marzgal, Mercurio in west private houses.
- Feather of monster bird in the granny private house to the east.
- Tears of spirit are hidden in a barrel behind smithy.
- [town lore] Totori village is northeast of Haltea.
Castle part.
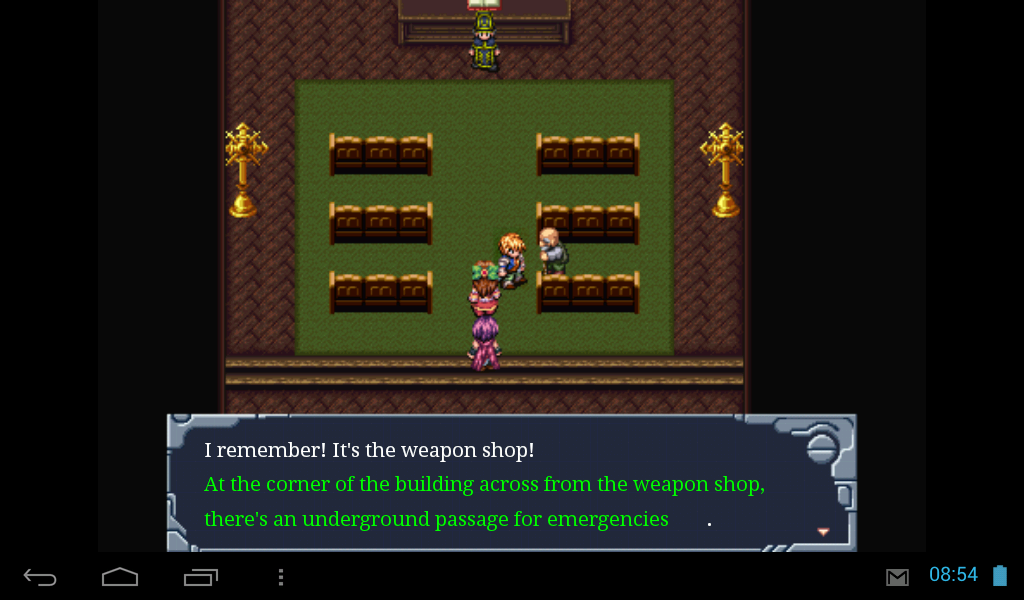 Guard refuses to let you in, regardless what you say. Then Bell remembers a rumor about the king having an underground safe passage in case the castle is besieged and you decide to go speak with the townsfolk about it’s entrance.
Go to the weapon shop. The sister in the church told you “uncle” tells stories 🙂 he tells you he heard it from toolshop owner (same room, a bit east) who tells you he heard it from blacksmith 🙂 . Blacksmith sends you to inn’s mistress who sends you back to church where it all started 😀
“… at the corner of the building across the weapon shop” is exactly the southeast end of the town map, just a bit below the tool shop door. Bell will tell you she spotted it when you are near.
- Silver ingots and Zelians in the first part.
- Still inaccessible Pressure plate, Landhoes and Zelians in second part.
- Third part of the underground passage is a moving barricade labyrinth. It has a tunnel to part 2 for the pressure plate. Go and press it. The way back will be cut, but you may proceed to the next part. There is another pressed plate. Depress it and go west and then north to collect the other silver ingot source. Return. Press it again and go north west through the next corridor.
You are back to the labyrinth with some more places accessible.
- Find your way south to another pressed plate near the closed entrance to the first part. Switch it off and another way west opens. Go there. It is another room like the one to the east with three corridors and a pressure plate. Don’t press it yet. Go east and collect the tears of spirit from the chest. Then press and go north. Another pressure plate must be switched off and the stairs up are finally accessible.
- Final area before the king. It has two rooms. First some more silver ingots and refined steel shiny sources, secret alcove to the west with 3 chests – dark and fire soulpebbles are inside and another silver ingot too. Keep north. You will enter castle basement. Only the stairs are accessible for now. Go upstairs.
As a pursuer.
Bell wants to help heal as many people as possible, so you decide to look around the castle. You can’t do much for them actually. Most of the doors collapsed, so you get back to the first floor where the hole is. There is a storage room to the south. Go loot. Zenacion medicine, pass “S02” and a tome of Swallow.
Speak with the remaining castle protectors.
There are tomes of Javelin and Pure white cape in their room.
Two of the people will sell you things and one of the soldiers is ex-Bishop who will cure you completely. He will also explain about the bigger bot and how all of them left. You decide to follow them, because they obviously stole the soul stone.
Spooky hole.
- First area is a cave. There are a chest with tome of Valkyria and a silver ingot resource in the main part of the first area. There is another smaller cave to the north with Tear of spirit in a chest. Loot and go back to the south area. Leave the bridge for later.
- Second part is a gallery with purple liquid. Don’t step into the pools. There is a tall bridge heading further east and two areas accessible from the first cave with chests (tome of Double chain, drop of mazie, soulpebble of earth) and shining resource giving totori steel and silver ingots.
Every monster in the purple gallery is strong and has some special attack but they give enormous experience, so stay a while here and train to level 30 🙂 You will thank me later. When tired or bored from leveling, use the bridge to enter next part of the Spooky hole. It is another cave.
- Monsters are bearable in this part. There is a chest with tamina medicine and some shiny resources. More of the cave to the east and the local boss monster to the north. Don’t go north yet, loot the eastern part of the cave first. Unfortunately, you will have to get wet in the purple pools, but the rewards are cool. Chests with 4096 gold, tome of Knight armor, tome of Cane of the wiseman, shiny sources of refined and totori steel. When done, heal and go north.
 Beccel Heiman.
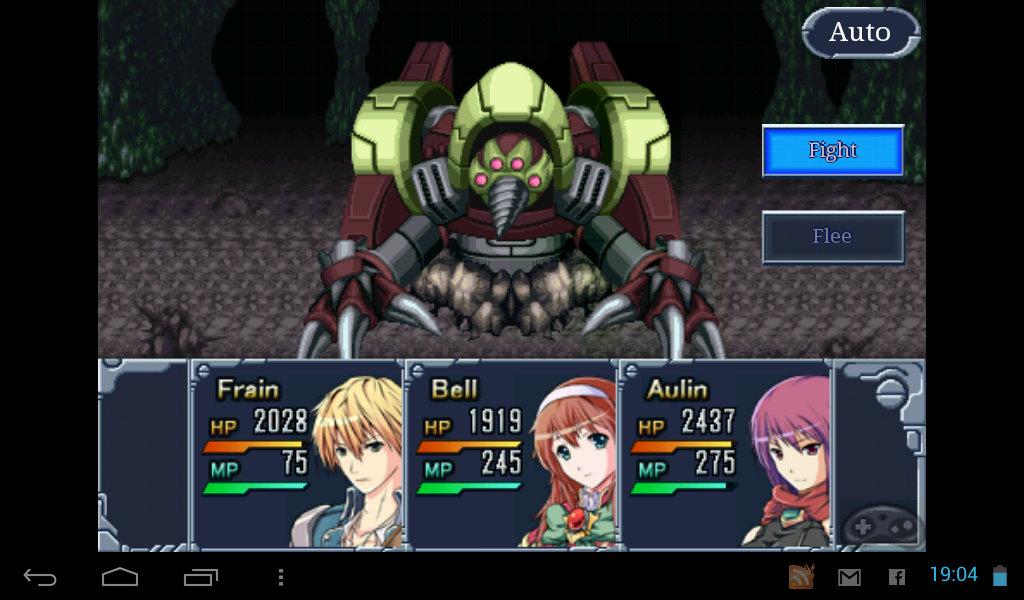
If you listened to train to level 30, you will be fine in this fight. He hits for 300 damage with his mass attack and 600 on his single attack. 10000 hit points of damage and he is down.
8000 xp, 2000 gold and 4900 skill points. You get the fire soulstone ore. In his room you will also find a source of actuate sword tips and round shells.
You emerge from the cave, near the fishing village of
Totori.
Aulin is from around here and it seems everyone speaks Irish. You can’t do much in this village, but there are some good things laying around.
- Tome of Guardian, root of Azi, Shine of sun, sutole herb and totori steel in the barrels.
- Soulpebble of darkness and 2048 gold in chests hidden in the forest north.
- High branch trimmer tome in a chest near the village entrance.
- Cane of branches and leaves tome in the NW house.
- Cane of water spring and Cane of phosphorescence tomes in the house next to it.
- Tears of spirit and Faranks tome in the NE house.
- Magical robe and holy robe tomes in the fisherman’s house to the Southeast end of village.
It seems part of the island is accessible with boat or ship… if you find any. There are not many things you can do on this island. The city of Totori is here, so you can return later when needed using the map. From here you can do some things that are not part of the soulpebble collection:
- Visit the local cave (you will need it later for quests, but some training is okay too),
- Open the next area of ancient tower with the pass card or
- Return to Haltea to continue with the main quest.
Cave of surf sound.
Go east through the bridge to the next island and enter the cave.
It looks like a flooded underground facility. Multiple areas. In the first one there are some shiny sources – totori steel. Two chests with dark soulpebble and Hurricane tome are also in the corridors.
A monster called Noid is here. It hits quite badly but gives a lot of Experience and gold, so take your time taking down some of them for sport and profit. If you came here after visiting Haltea’s guard station, you can make five kills for quest. On return you get fire soulpebble, 3000 gold and 2500 SP.
Second area is a movable wall labyrinth and has sea monsters and some more Noids. Their “main force” hit does 200+ damage, so don’t take them lightly. More totori steel shiny resource and chest with wing of spirit. Go southeast to next area.
Third area is a cave with stairs. and lots of water. Harder water monsters who can cast buffs. It seems part of the area is flooded and you can only exit through the north where a floor plate and a shiny resource is found. Press the plate and return. The water is gone, so proceed south.
There is another room with a pressure plate that looks like an exit. Enter and press it. Then return.
Hard scale and dirty fur source to the east. Chest with soulpebble of wind to the west. Chest with soulpebble of water and another totori steel source to the south. The exit to the next area is open. Nothing really interesting there.
Soulpebble of water and a tome of Igzect are in the chests. Stairs up to the next area.
Tome of Radar in the nearest chest, totori steel in the last room. If you don’t have the Totori quest for the missing boy – this is the cave’s end 🙂 but at least you trained your skills a bit. Return to the land from the menu’s exit option.
|
|
Mysterious ruin S2
There are many dark corridors, so be careful not to miss something, like the shine of sun in a chest north from the initial teleporter. In basic you need to do the same. Find stone slabs and open door deeper.
Riddy will translate some of the gibberish in the means of “sudden attack and the writer being frightened”. Another door will open after this. The door is to the east. Go there. Monsters in this area are quite weaker than you if heard my advice to train.
There are three chests, one immediately to the West, one a bit SW and one SE from the next stone slab with Fruit of life, Tamina medicine and Ankh of swift wind. Be sure to grab it for permanent Speed-up buff. The slab itself explains the person from the future found peace in the nearby town with a woman and opens the fifth gate.
Another slab and a portal that wants card “S03”. Riddy will decipher much more clear message now (apparently he is secretly studying the ancient language). The city name was Elenoir, with generous people who he decides to help with the technology of the ship. He thinks this planet you are living on now is in hyperspace and huge chunk of metal has been left floating in space so the ship can transfer here. Ruddy is exhausted and you can’t do nothing more in the tower. Not unless you find the next card. Go back outside.
Return to Haltea.
There is no guard on front door now, so you can enter the castle. They seem to recover fast 🙂
Guard station will give you some quests and exchange your smooth cloth to gold thread in rate 3:1. Much useful item for upgrading armors. Most guard quests can be done in the tunnel bellow castle, one of them outside Haltea and one in the flooded cave east from Totori. Lanpancho is not on this continent, so leave it for later.
People talking.
- Nearby island has a spirit fountain.
- An old man in the infirmary below castle will tell you about Yuuizo. He appear to be some crazy Casanova and drunkard in his days. He is gone east across the sea, so Bell tells you to chase him 🙂
- A soldier in the castle, near the king will give you 4 tomes of armor. Dragon, whale, wood and stone. 4 tomes of clerical outfit – light red, blue sky cloud, tender green and boiling sand. 4 tomes of mage robes – flame, lipid stream, bark and bedrock. All of them are elemental armors specific for all your chars.
- The king’s son has taken the crown and is organizing stuff. He leaves the soulstone with you and sends you back to Totori village to ask for a ferry. He promises to prepare a battleship for you next time.
Loot. There is hidden room behind the king with 3 chests. Water, light and wind soulpebbles.
[Trauma] A soldier in town has a bad onset of claustrophobia. Aulin will spook him out and then you decide he needs your help. Speak with the soldier next to the king. Apparently mr. Muller saved a boy’s life in the attack, so you need to find the boy. Go in front of the church and speak with him, then bring the soldier and the boy together. He is in the same spot.
[Beauty inside you] Go back to the throne room. The king will decide to come see the soldier himself. Get back to them and listen to all the weepy talk. 8000 SP and 300 gold.
Blacksmith will give you tomes of Gradeus, Crowk and Cane of ocean.
Two things you can do from here. Submerge in the tunnel to complete some guard station quests or go directly to Totori via the map. Up to you.
For doable guard station quests you will get tome of Dragnor, 10 silver ingots, 5 souls of giant, 10 crystals of magic power, 7000 gold, 5000 skill points. Noids are in the cave east of Totori, not hard but shows rarely. Lanpanchos are found in east continent. Leave them for later.
Mission: As a visitor.
Return to Totori.
Your second visit is a bit better.
- You can stay with the grandma in the SW house if you need rest.
- Most of the people will tell you the same nonsense, except the two sailors near the shore. They send you to help a boy who braved the cave of surf and sound.
If you haven’t looted it yet – now is the best time 🙂 the “boy” is actually a fully grown sailor in the last room of the cave. He collects cave ater for his sick mother. He leaves immediately after Bell cures him, so follow him to the village.
And as you already expected, your reward is a ship. It’s strange how generous this sailor is 🙂
Your next target is Cureo to the east of this island, on the mainland. But I recommend you have a good look around with this ship:
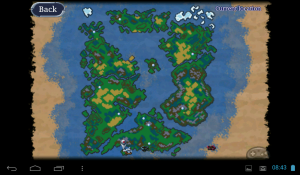
- The world is round. Going west will send you east eventually. North -> South too.
- Sail around the west continent. You will find some islands accessible by ship and others accessible by air only. Later you will find the means necessary to land on them. For now focus on the ones that are easy to embark on and don’t have too strong monsters.
- Sea monsters are bearable for level 40 heroes, so if you got my recommendations to train – you will be just fine.
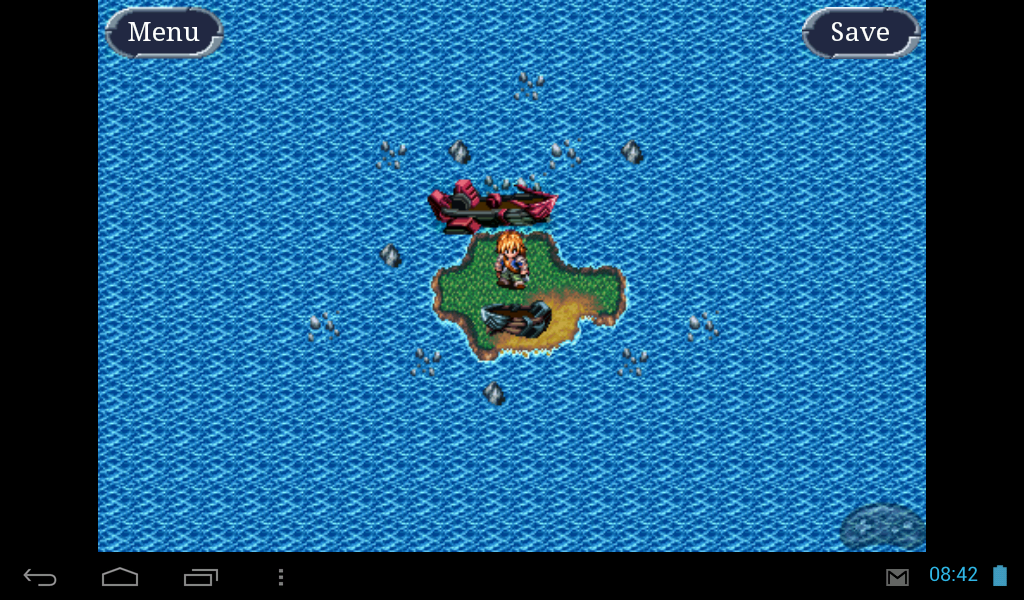
- There is a small wood area with entrance accessible by sea only just a bit south from Col village. 2 resources for gathering, Right arm of a big tree and rotten seed.
- A little bit west from Col’s shore is the house of the old woman on a solitary island. Soulpebble of darkness is hidden in the drawers. She tells you she is alone, but there seems to be a hidden room to the east. A glimpse is seen, like there ends another wall. You can’t access it by clicking, so mark this place for later, when you return here for Yuuizo’s quest.
- North of Lecom, in the bay, there is another mine accessible by ship only. Silver ingots inside.
- West of Keyan is an island with a mine you can’t enter with the ship. Leave it for later.
In the map center, there is a castle accessible by air only too.
- Fountain of spirit is on the small ice island in the NW corner of the map. You can find Lanpancho inside to complete the guard station quest. Reward is good: Tome of Zeus Beard, 2000 gold and 4000 skill points. Leave this map alone for now. The monsters are a bit above your level. You can still train, but there will be the need of frequent healing.
When you feel bored from all the islands, disembark on the east continent.
Only the local boars will pose some threat if they use Strog to buff themselves. Apart from them, the other monsters are easy to take down. You may as well go directly to the castle by boat if you enter the gap between the north and south part of the continent near the bridge.
Cureo castle.
Everything is in ruins.
Almost everything.
Fraiya from your “old” world will meet you again when you enter. She will try to persuade you again to leave with her. Both Aulin and Bell will try to chase her away this time. Let her know you can’t trust her with so much devastation around.
There is not much left to do on the ground.
Loot.
- A tome of Steel mail is in the chest near the SW corner.
- Chest with Robe of blessing tome in the center.
- Dirty fur shiny resource in the map center and a silver ingot in NE corner.
Half of the Earth soulstone is glittering near the NW corner of the map. You need to find the other half. Bell tells you about the library in Dandong after Aulin asks her about the spirit well of the gods. You decide to go back to Dandong and the quest “As an outside observer” will start.
Don’t forget to enter the Cureo castle dungeon. Or what is left of it.
Area B1f.
Diary of the architect explains how the castle was attacked by the thabitors and the massacre of everyone living above the ground.
5 chests in a hidden room with soulpebble of fire, earth, water and sun. Also a glitter of moon.
Area B2f is just one hall with stairs.
Area B3f is a almost looted treasure room. 2 chests stay intact . Transfer pass “S03” and wind soulpebble are inside.
Three courses you can take for om here. Find the tome explaining the whereabouts of the other half of the Earth stone, Ancient ruins and the cave of the Fountain of spirit.
Get back to Dandong.
Enter the library and search for the book Bell told you to find about the other part of the earth soulstone. It is in the eastern book shelf. It tells you about the fountain of gods and how they could not recover the ear of the fire spirit god. You need to go back to Cureo and find the other half.
[offtopic] Some of the next nights you sleep in the granny’s house in Totori, Frain will explain why robots are not resistant to lightnings. He will also tell you about his polluted and overpopulated world, but this seems irrelevant. He also tells the girls about elections and so 🙂
Back to Cureo.
The moment you enter, you will be confronted by Jinzer. If you listened carefully – he is vulnerable to lightning and has 25-30k life points.

As a voyager.
Now, you can continue with the main quest line or take down 3-rd part of the ancient ruins and visit the fountain of spirit. Up to you. Skip the next area if you are lazy.
Mysterious ruin S03
It takes quite the walk to get to the teleport gate.
This part is full of stairs and some Noids to train on.
Riddy will translate next tablet about ship not having power to charge everything and Johndoe being stranded oin this world.
Sixth door will open, but first go West of the first tablet, there is a chest with sheep’s wool. A 30 points water resistance trinket.
South of the sixth door is another chest with Drop of spirit.
Go northwest to the next tablet and portal. Just a bit before them on the second staircase is a chest with gold rimmed glasses. 20 evasion points trinket.
Open the tablet and Paul’s voice will echo instead of Riddy. He wants historical record 🙂 and you patiently wait for him to leave Riddy alone.
The translation roughly explains how the townspeople denounced the friends of Johndoe and murdered them. He had to flee like a coward and lock himself in the ship. Only a specific neutrino ray can unlock it. Even if you suspect part of the world history is hidden – you decide to move on.
Next portal wants pass “S04” so you will get back here some time later. Menu -> Exit -> Yes. You don’t want to go all those corridors back.
Fountain of spirit.
Northwest ice island on the world map. Grab the ship and go there. If you use the map for quick transportation, your ship will go to the nearest water square beside the town so go to Haltea using the map and head north by boat.
Few thing you should know:
- Map area is circular.
- Lanpanchos are extremely hard to kill, but the rewards are good 🙂
- Purple pools suck your mana points and you are gonna need them. A lot. So – avoid them.
- You can always return to Haltea and rest in the Inn. It is not one-shot area.
Fountain of spirit is divided into rim parts. Entrance area does not have much to do. Just kills.
The part west (or east) of entrance has chests with fire and wind soulpebbles and a glitter of moon. To the north is the entrance to the inner rim:
Forest of ambivalence.
This forest is a labyrinth with a choice of crossroads. Every wrong choice returns you to the previous map. Better remember signs if you prefer to solo and not use this guide. For everyone else – just use the red flowers lined exits and you will always be right. Here is a summary:
- Go west, loot the chest for soulpebble of water.
- Go north.
- Go east.
- Go north.
Done. You are in the inner circle of the Fountain of spirit.
- A chest with Robe of sophistication tome is found on the NE shore.
- Cape of red rod tome is found in a chest on the opposite end of the shore.
- A Lanpancho is hidden in the forest. Bully him if you still did not find Lanpancho for the guard station quest.
Spirit god loves Aulin’s teetees and the party’s surprise and appreciation. When all the talk is done, he will ask you which world would you choose to go next and he will explain beginning and ending while threatening Aulin to steal her breasts. He then opens a road in the forest for you alone 🙂
|
|
As a regenerator.
Teleport to Cureo and walk south to the bridge, you will stumble to a small ridge of el Aldo mountain. Cureo’s side. Enter.
- Near the entrance you will find Right arm of a big tree/stout branch source and a chest with tome of Bowie axe.
- Drop of spirit, Tomes of Palladius and Pluto are also in chests laying around.
Beware the Thabitests. They are agile and can do 300-500 mass damage twice per turn. Nevertheless, kill as many as you like. Good experience.
Holy mountain of el Aldo (south)
Everything is brutally strong here and most have mass attacks, so save a lot.
Source of el Aldo steel and tears of spirit in a chest.
Holy mountain of el Aldo (north)
Source of el Aldo steel. 3 cave entrances. 2 Northwest and 1 Northeast.
Caves are a bit annoying, because you may easily loose track where you’ve been.
Northeast cave will lead you to the east part of the plateau.
Northwest caves have source of holy drops and clear water. Chest with wind soulpebble. The easternmost cave will lead you to the west part of the plateau.
West plateau has caves with el Aldo steel, round shell and rotten seed source, another cave going north to a source with el aldo steel.
East plateau has a chest with fire soulpebble. Cave with source of black wings and rotten seeds. Cave with passage north leading to a staircase cave. Walk it to the top and you will emerge to the abandoned cabin on top of the mountain.
Abandoned cabin
Loot and rest.
Cape of fresh wind tome in the book shelf and nothing in the barrels. Proceed East to the next area.
El aldo and refined steel sources. Chest with earth soulpebble.
Proceed south.
Beware the De la Croix lizards. They can punch about 1500 damage per turn.
Soulpebble of water in a chest to the west, soulpebble of wind in a chest to the east, another chest on a ridge in the map center with a light soulpebble and a source of el Aldo steel. It is accessible through a tunnel in the rock to the Northeast corner of the map.
Hard scale/right arm source in the Southeast corner. Fire and earth soulpebbles in the southwest corner.
Proceed south to the Chasmus side of the mountain path, cross it and you will be finally off this place.
 Castle Chasmus.
A soldier will feel your butts for weapons 🙂 and then tell you to keep low profile. He will also explain for an almost complete plan to connect Chasmus and Dandong via tunnel. You will never see it finished though.
- In the Inn you will find a book pointing to a burried stone in a dark cave (Cave of Darkness, accessible via airship only)
- Local armory will finally have some good weapons and armor. Prepare to spend about 50000 gold there and some more in the smithy.
- Local priest will tell you about Yuuizo getting lost in el Aldo mountains and his coming to Chasmus.
- [Seek out a legendary musician 5] Seems like Yuuizo decided to go to some small village to rest in the end and Bell fights Aulin with words about how wonderful he is actually.
- Chest with earth soulpebble in the NW map corner.
- A woman tells you about a small oasis to the south. A perfect place for picnic. A boy in a private house mentions something big flying in the sky (there are places inaccessible by ship on the map).
- Troia tome in the NE private house library
Castle 1f
Get the guard station quests. They exchange 3 dirty furs for 1 high class genuine leather. All of the killing can be done in el Aldo mountains.
Castle B1f
Loot. There is hidden leprechaun in the dark area north 🙂 he gives you a collection of costume tomes – curtain and sheet.
El aldo steel, Ragnarok and Cane of the sun tomes in the entrance bookshelves.
Castle B2f
This area is accessible from 1f only.
- Chest with tears of spirit.
- Chest with transfer pass “S04”.
- Chest with tome of Black mail.
Castle 2f
Go up first. Loot the king’s bedroom. Tomes of Brionac, killer queen and two more parts of the world history concerning Chasmus founding in the mountain of el Aldo.
The king will be a bit scared of you. He will call you cursed and will kick you out of the castle.
You decide to go to the small forest to rest a bit. After small dialog in which Aulin will try to cheer you up, Fraiya will come to try her luck on you again. While you speak, Chasmus will be besieged by another machine squad.
Mission: As a suspect.
Return to Chasmus and enter the Inn. 5 thabitors for killing. Innkeeper will give you some soup to heal you all.
- 5 more bots in the smithy.
- Thabitest in the weapon shop.
- Another thabitest in the tool shop.
- Another in the church. One of the sisters will cure you after the fight.
 Go into the castle and head straight to the king, All side rooms are blocked by bodies.
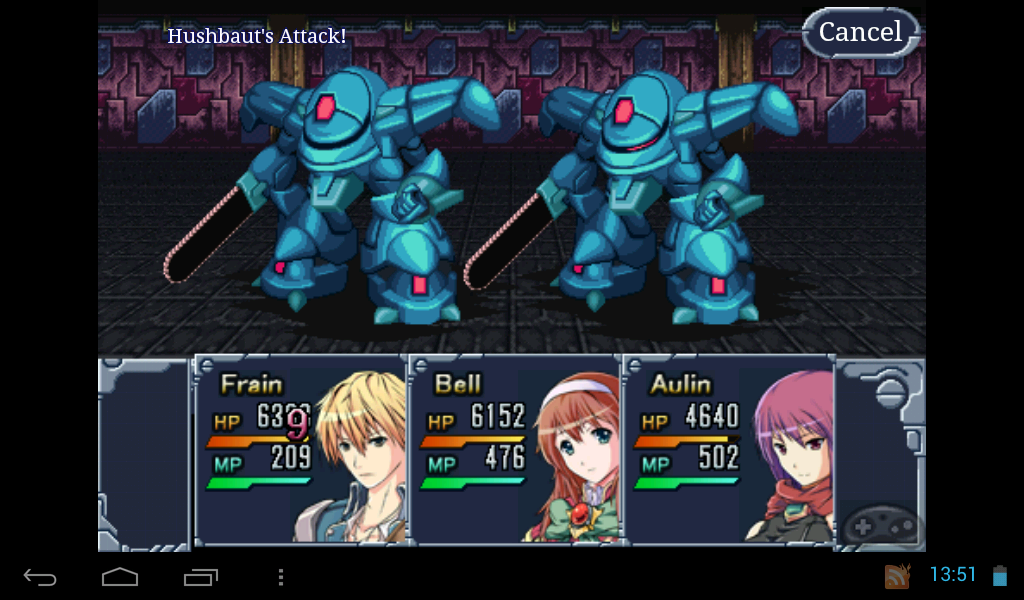
The king will offer his kingdom for his life. Fight the Hushbaut. He has 30k life points and does not like lightning. Laie is a good spell against him. Chasmus’ king will give the wind soulstone.
Speak to him again and he gives you a [Request from a depressed king] to find Cureo’s banner for the mass funeral.
Mission: As a seeker
Complete all possible side quests.
Revisit the blacksmith in Chasmus. He will give you Luwahha, Fafner and cane of Starsand tomes.
Go in the wilderness. Complete guard station quests. They are worth it. Some of them can be done easily in el aldo mountains using the hut to rest.
- Lugh Lamhfhata tome and 5000 gold for 3 De La Croix kills.
The others are not so generous, but still:
- 10 gold threads.
- 10 smooth cloths.
- 5 fiery fire bags.
- Soulpebble of wind and
- Tome of Lucseon.
There is a mine east of Chasmus with steel lines and el Aldo steel.
Return to Cureo to find the flag. It is a blood stained red rag located in the most southeast end of the ruined town. A green light marks the spot. Return it to Chasmus’ king. 5000 gold and SP.
Return to fisherman’s village of Totori.
Enter the Northwest private house and speak with the grandma. Aulin will speak some gibberish with her as well. Turns out Yuiizo was a rope maker in the village. Quite clumsy. She translates the story in English later. Turned out he discovered to actually like fish and went to another fisherman village to try other recipes 🙂
While you are here, grab 3 more quests from one of the private houses. Seems there are monsters around the island and the village is starving. Just sail around and kill the monsters. 10 totori steel, 10 white steel threads, earth soulpebble and 2000 gold.
Return to Dandong and enter the Tower again. You have Pass “S04” now.
Tower S04
Find all chests.
They are very generous here.
- Tail of lizard (fire resistance +30)
- Claws of mole (earth resistance +30)
- Seed of magical power
- Tears of spirit.
- Juice of demazi.
De la croix will be a problem, so save a lot. The last tablet is in the north part before the portal.
Johndoe died alone and was forgotten. The end.
You get 50000 SP, 2000 gold and Aurora cape (+15 all resistances and +30 allure) for your troubles. The portal transports you to the beginning where the vending machines are. Get back to the beginning, so you continue the main storyline.
Dandong.
A soldier wants 3 pieces of el Aldo steel for alchemy and gives you el Aldo alloy in return. If you need the alloy, he will make another. Repeat as many times as you need. One alloy piece is worth 2500 gold.
It looks like Paul will betray you. Machine soldiers will come to arrest you once he sees all soulstones are in one place. Then it turns out he is actually using them for defense. Somehow he managed to reassemble them from parts of beaten robots.
 A flying robot will attack the castle and Paul will send you to fight it. Not hard. First 2 thabitests. Then two times of three.
In the fight will join Shaft from your old world. Gloating. Girls will be on your side as always. Castle soldiers will come and outnumber Shaft’s bots and he will leave with a flash. Happily, abandoning his flying machine.
As a challenger.
Now you have a flying machine and access to three more areas of the map.
Cave of darkness, Froma town and the Mothership from your old world.
Cave of darkness.
Entrance.
Lots of XP per kill here.
Piece of darkness source in a hidden area to the southwest. Another source a bit north on a ridge. Sun tome in the northart of the map.
There are two staircases to the east. One of them is hidden. Inside the box you will find a monster which immediately attacks you. The other staircase leads to the next part of the cave.
East area 1.
Piece of darkness source.
Some chests clustered together but with different approaches. NE has tome of White knight. Cane of shooting star tome in another and Star man tome in third.
Keep going east.
Bridge area.
Nothing to do here for now. Keep east. You will get down there soon.
East area 2.
This area is generally a staircase down below the bridge. You will probably find Goldonoid monster giving 5000 gold per kill, but you already feel this game is not about gold digging.
Just get down below. Only a Chest with Robe of purification tome.
Below bridge area.
Aulin and Bell will tell you a story regarding the black soulstone and the avatar of darkness.
Nothing scary. Many elementals and a piece of darkness source. Keep north.
Avatar of darkness.
You will stumble upon an old man in the end. He is 1989 years old and keeps waiting for you 🙂 his name is Velvas. He is a spirit god of darkness and will explain that the soulstone is inside each and everyone of you. You need to answer if you like darkness. Then he will mention some stairs for you to use next time, but I did not find such thing.
Your reward for reaching him is tome of Balor. This is an ultimate weapon and you need many darkness ores to upgrade it to +3.
 Froma.

This is a castle in the central island between the three continents. The harbor has been destroyed by a volcano eruption and the village is only accessible trough air now. Aulin shares a rumor that there is big underground castle below Froma. Have a look around. I did not find anything 🙂
- Another leprechaun hidden behind the northeast house. Gives Fur poncho and Handmade poncho tomes.
- 8192 gold in a chests
- Tears of spirit, Water and fire soulpebbles in barrels.
- Ever victorious cape tome in the toolshop book shelf. And also good weapons and trinkets worth about 100k in gold. They are good, but before you buy and equip them, have a look below in the airship description. Some of them can be obtained without paying gold.
Visit the smith and tell him you are from another world. He will gift you a tome of Caesar. Be sure to upgrade all new weapons and armors you bought.
One of the houses seems to have a hidden room but I did not manage to find an entrance.
 Airship.
Have a look at the world map. It is in the southeast corner. There are all kinds of monsters inside. Lots of corridors and rooms. Beware the Ende lizard. It has 15k hitpoints and 2 mass fire attacks per turn. There are two corridors in the first area. South and North.
South one has three rooms with chests. Diamond earrings, with mp and hp recovery. Cross of resurrection with 12% HP recovery and resurrection. Ruby earring with 1% MP recovery and +440 attack power.
Head north to the other corridor. Shield of the four gods is in a chest in one of the north rooms. Evasion +15, all resistances +20. Cross of blessings in the other. HP recovery +5% and echo.
Airship area 2
Head south first. Small room with two chests. Tears of spirit and seed of magic power.
3 rooms in north corridor.
- Earth soulpebble.
- Water soulpebble.
- Wind soulpebble.
- Gold-rimmed glasses.
- Second pass (you need this for laser door)
- Tears of spirit.
Go east and loot the last room. Fire soulpebble and tears of spirit.
Airship area 3 is a two levels cross section. You can’t go down from here, so just head east.
Airship area 4 is full of corridors and a laser door to the east with a pass. You can’t enter if you don’t have pass one.
Two rooms to the northeast. One has hidden chest with scripture of the spirit gods. The other has a chest with Juice of Demazi.
Earth soulpebble in a chest near some crates.
Two exits to the west. West and Southwest. They lead in two areas connected with each other.
Southwest is a treasure area. Hidden room with four chests. Soulpebbles of light, earth and fire, 12k gold.
West one leads to the two leveled corridor. One chest with drop of mazie. Another chest to the north below the bridge with First Pass.
Return to area 4 of the airship and unlock. The room immediately after the laser fence has a chest with Tears of spirit and a thabitor that will heal and restore you. Be sure to use him 🙂 he will be extremely happy.
Airship area 5.
You will need Second pass to proceed (read above of you did not have it)
Enter the next room. You will be attacked by 6 Hushbauts. They will come in 3 waves. Their only Really deadly attack is Venom, so be watchful and prepare to mass-heal. 150k xp.
 Proceed north and comfront Shaft.
He will summon Fraiya and steal all soulstones. Then he will switch her on. Aparently he made a cyborg out of her and now she hates you 🙂
Hit her hard. She has one bad ray attack. Heal between turns and keep hitting. About 30k hitpoints and she is down. Bell will try to cure her after the fight, to no avail. You will receive a piece of her in the end. Shaft will teleport away and the airship will start falling.
Get out by using “Exit” from the menu and complete all side quest that remained.
Return to Col. There is another shining place behind the house where you first emerged. Soulpebble of light.
Bring Fraiya remains to the spirit fountain to the Northwest end of the map.
Spirit gods will materialize and welcome you. After a short BS they will allow you to bury Fraiya’s piece and ask you to return their soulstones back. Frain will get a new hope that Fraiya’s soul is still out there.
Complete Yuuizo quest line.
- Return to Froma if you did all previous tasks around the two continents. The boy beside the inn will tell you Yuuizo did not like living in Froma and left for his place of birth. Obviously NOT Dandong.
- Go to the island to the southwest of Dandong (south from Lecom). Speak with the old woman. She is his wife, he passed away forgetting her face and left his old notebook. She wants you to fulfill his promise to write songs.
- Return to Dandong. The boy is still waiting near the herbal/tool shop. The boy decides to live on the road and write down Yuiizo’s biography. Tome of excalibur, 50k SP, soulpebble of light.
Young king’s wish
Return to Haltea to collect the last hidden quest named “Young king’s wish”. In short you need to find out why Paul in Dandong hides that his king is dead. Go there and give Paul the letter. Frain will confront him about the king’s whereabouts . He will send the guards away and reveal that the king passed away three years ago and this secret was his dying wish. Dandong seems to have been in such situation 14 times already.
Get back to Haltea. Speak to the king to complete the quest. 2000 gold and soulpebble of darkness. 5000 SP.
End game
Get back to the wrecked airship to end everything. There is one new hole immediately north after the entrance.
- Beware the Hell cats and their Venorve attacks.
- Many Hushbauts with venom attacks.
There are enough monsters and restoring robot in the above levels to train your party to level 99 without much risk. Take your time. This is the endgame and level cap is 99 max. Increase all your skills to the max level and if you want to invest some more time – collect materials to upgrade all armors and weapons.
Avoid the purple pools, there is always way around them.
There are no chests or hidden rooms. Only monsters and robots. Just keep exploring until you find the gate. It transports you to a blue area.
Blue area 1. Nothing to do here except kill many monsters. Only Full house is new and casts mass elemental damage. Exit from the north portal. Go there by using the right-hand rule.
Ship core 2. Just find the stairs down to another portal.
Blue area 2. Fight your way to the NW corner of the map to the next portal.
Ship core 3. Weaker enemies and green pools with platforms. Not a single chest again, so just use the portal.
Blue area 3. Nothing to gather again. Just monsters. Be extra careful against combo of hell cat and two full house behind.
Ship core 4. Keep descending until you reach the door. Enter. Short cutscene and you prepare for the battle.
Shaft will call the inhabitants of the world cattle and swine and summon his best robot to fight you. He orders the robot to swallow everything and the robot starts with him 🙂
 Final fight.

80000 hitpoints of damage and he falls.
Frain needs to choose if he is to go home or stay in this world.
If you stay, you will become bishop’s apprentice and probably marry Bell in a year 🙂
If you return, you will be stranded alone in hyperspace :-). Without worries. Alone. Forever.
Regardless what you choose – congratulations. That was all 🙂